Earlier we talked about thePOP3 tweaks in Outlook.com.
This would only suffice enough if you are a little expert in doing things.
The same controls which appeared in the earlier article can act as a guide.
But if you want a clear-cut explanation on the details follow the tutorial below.
StartWindows Live Mail 2011.
(If you are new to Live Mail, you could get it at this linkhere).
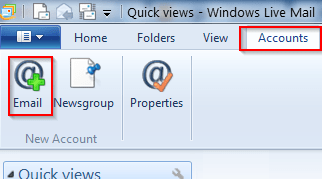
Navigate toAccounts > Email
So when you click theEmailbutton on the ribbon, a window will pop-up.
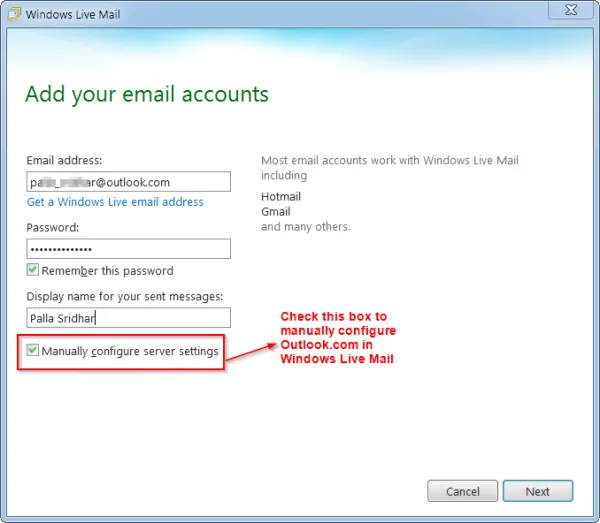
But our purpose is to manually configure the server tweaks.
So put a check-box to that option.
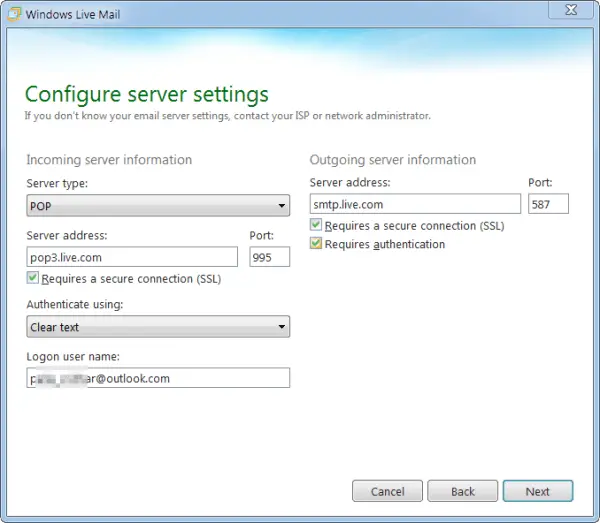
On the next screen, the screenshot will be something like this.
In this screen, you are going to configure the Outlook.com server parameters.
Taking a hint from the previous article, it’s crucial that you set the POP3 and SMTP setttings.
POP3 is used for receiving mail and SMTP for sending mail.
Under Server throw in, you have 3 options POP3, IMAP and Windows Live Hotmail.
I have mentioned the controls for POP3 access.
The following options are need to be set in this server configuration options.
Incoming Server Information:
Outgoing Server Information:
Click theNextbutton after filling and selecting the above data.
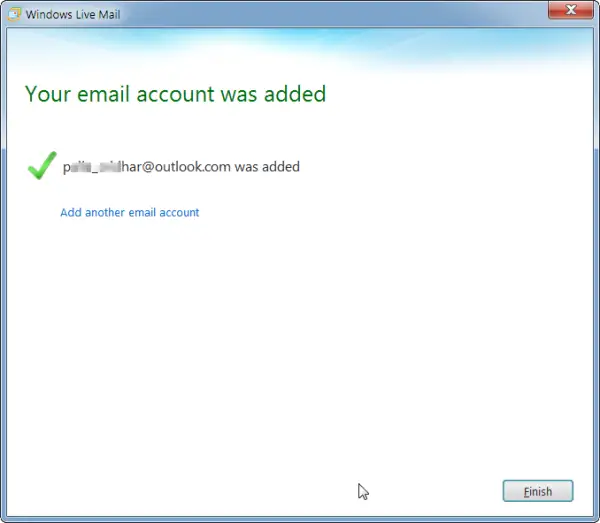
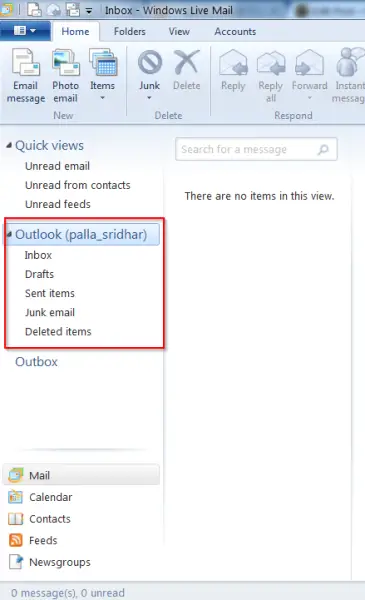
Now you should see your Outlook.com mail in the left pane of Windows Live Mail window.
Once your account is set-up, all your Outlook.com mail should automatically download to this mail client.
it’s possible for you to also send a trial message by clicking Email message underHometab.
Initially this will be queued up in Outbox.
But when you click theSend/Receivebutton, your test mail should be sent.
Bonus Tip: The keyboard shortcut to sync your incoming mails and for sending outgoing mails isF5.
