One of the more common uses of Google Docs is to make a Google Docs form.
you’re free to make a fillable Google Docs form with many different elements using tables.
Read on to learn how.

If you want to see the final product, check out thefinal form here.
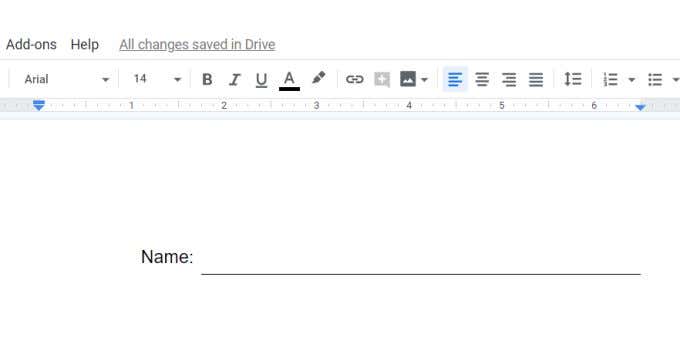
This is a label next to an empty line that you want the user to fill out.
This looks great, until someone actually tries to fill out the form.
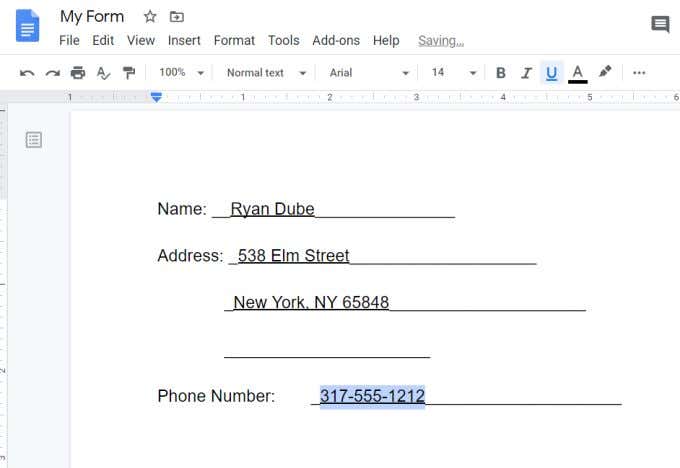
What youll find is that filling out the fields ends up erasing the field lines under each entry.
This makes the final filled-out form look messing and strange.
It would require the person filling out the form to underline the text.
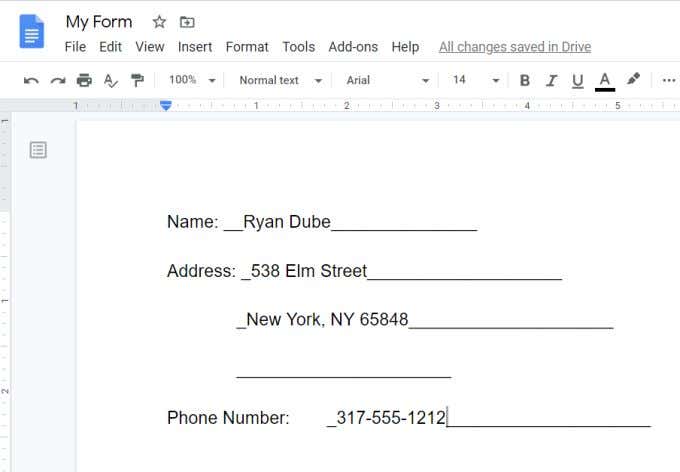
But this doesnt look right either, because the underline doesnt align perfectly with the field lines.
This same issue happens when people make a run at make fillable forms using Microsoft Word too.
However, Word does offer some special features for creating form letters that Google Docs doesnt have.
But what Google Docs does do well is fillable forms using tables.
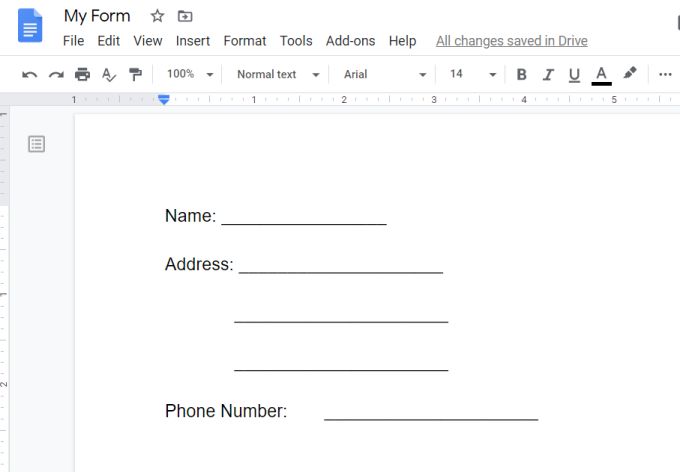
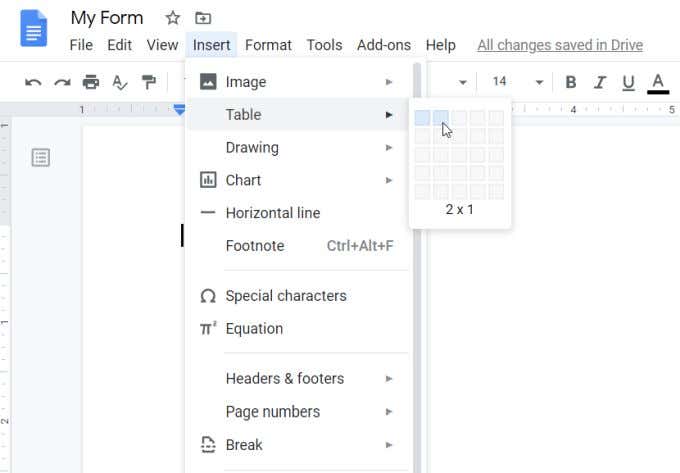
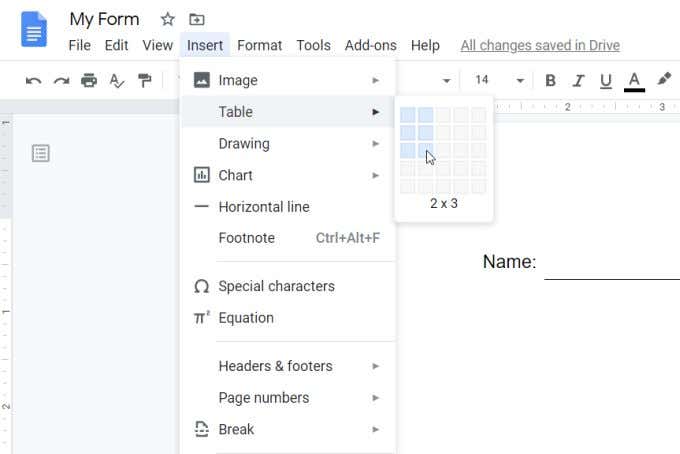
SelectInsertfrom the menu, selectTable, and then pick the 2 x 1 size for your table.
This inserts a plain looking table with just a couple of fields.
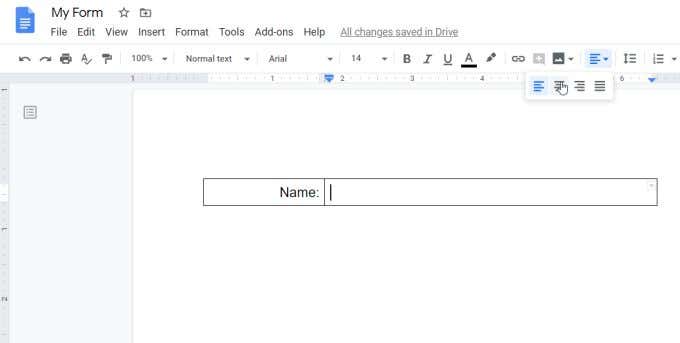
At this point, you have everything you better create your first full, fillable field in your form.
Once youre finished, this will appear like a regular underlined field for the user to fill out.
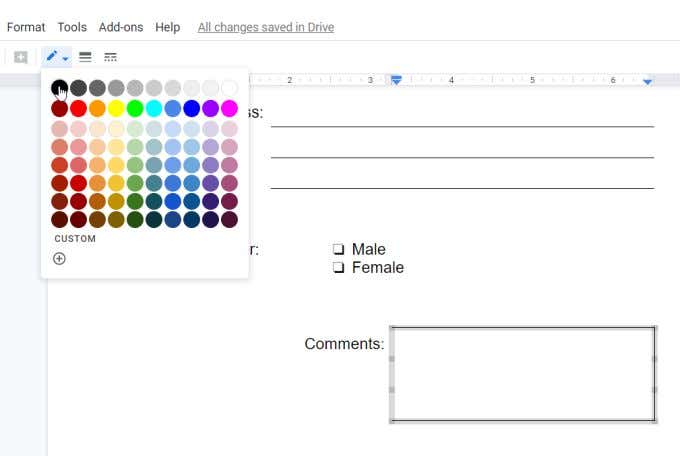
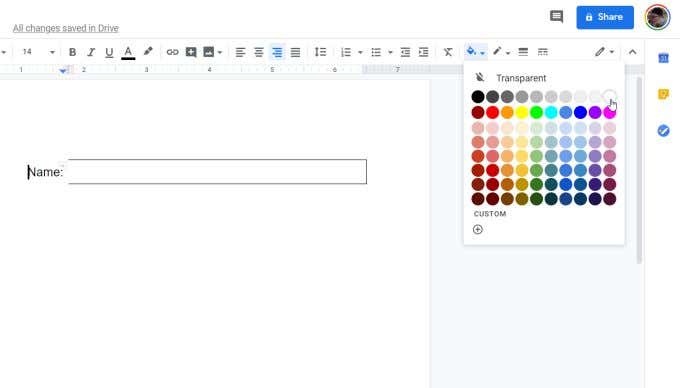
With the top cell selected, choose the border color icon and choose white for the top border color.
Repeat this process for the right border line as well.
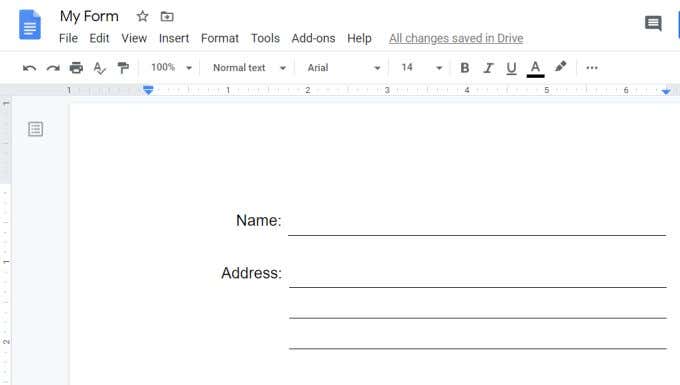
When youre finished, you should have your first fillable field ready.
For any other single-line fields in your form, you wont have to repeat this entire process.
Repeat the same process as above.
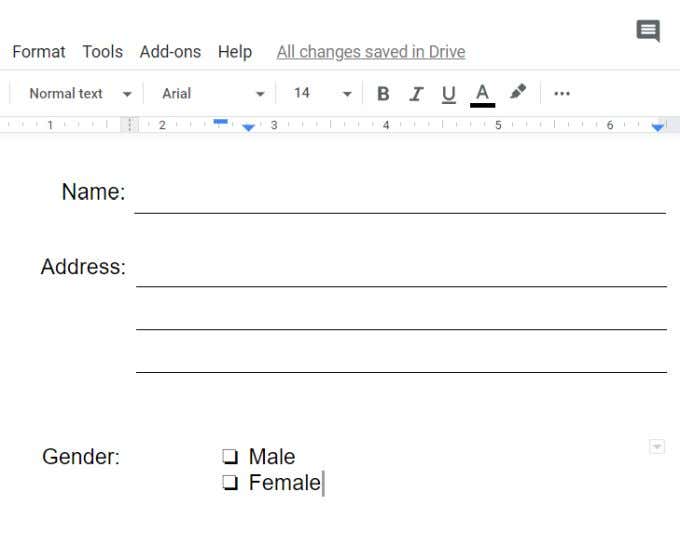
Add the label for the three fields in the first cell on the left.
Select all three left cells and remove the border color.
Remember to align the text to the right side of the cell.
Now, repeat the process above with all three cells on the right.
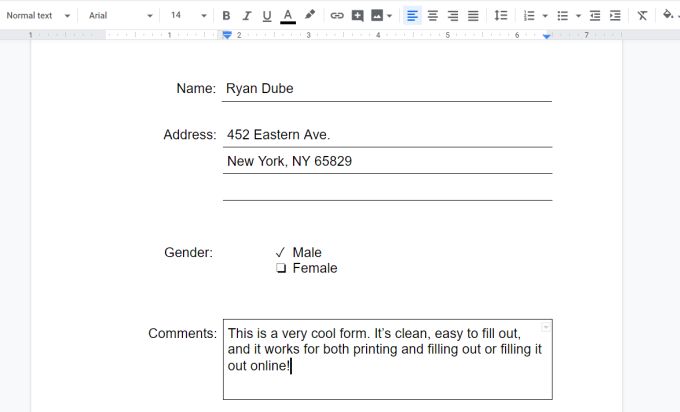
When youre done, your form should now look like the example below.
Its also very easy to align all of these fields by resizing the table cells as needed.
MakeCheckbox Fields With A Table
Next, place the cursor in the right cell.
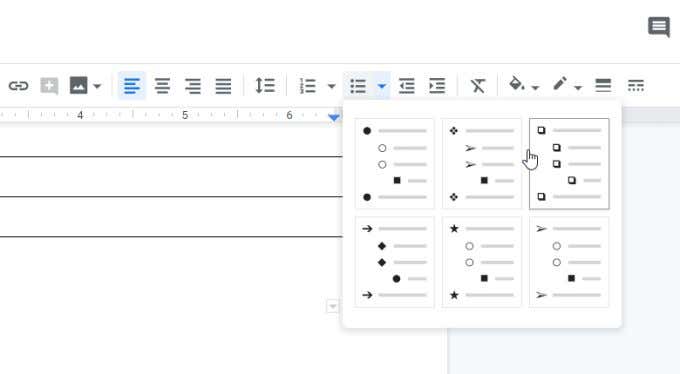
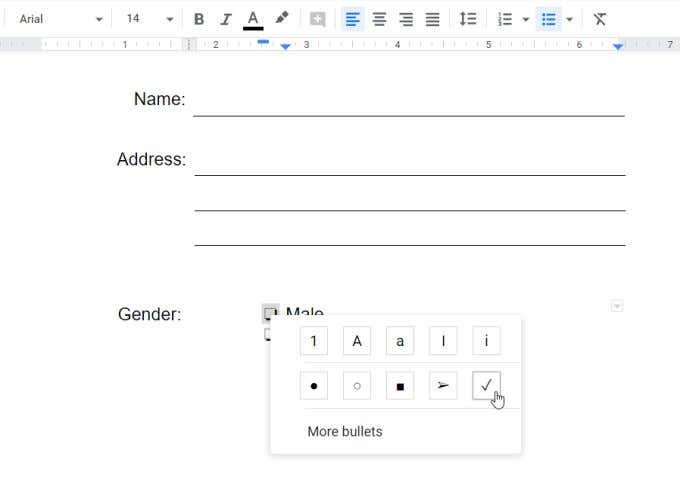
Insert a checkbox by selecting the down arrow next to the bullets icon and choose the checkbox option.
Keep in mind that these checkboxes cant be selected just by clicking on them with the mouse pointer.
Selecting them requires that the user double-hit the checkbox to select just that one.
Then they need to right-click and choose the checkbox icon.
This is fairly straightforward, but somewhat different than people are used to.
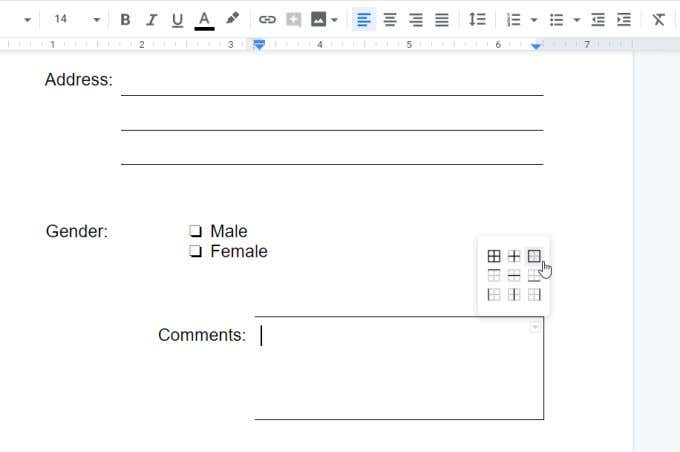
That means youll enter a 2 x 3 table.
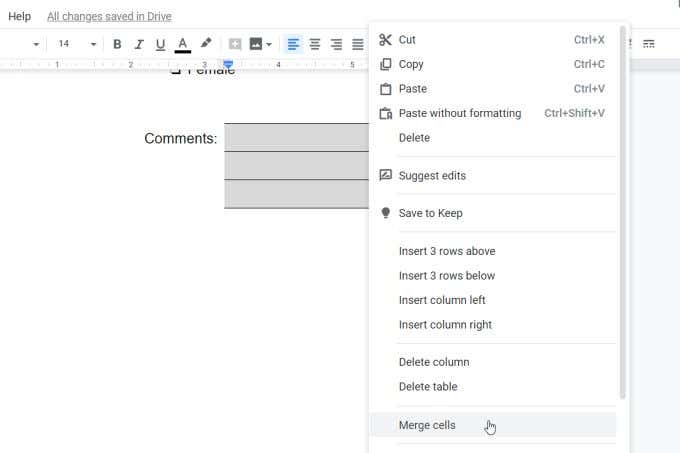
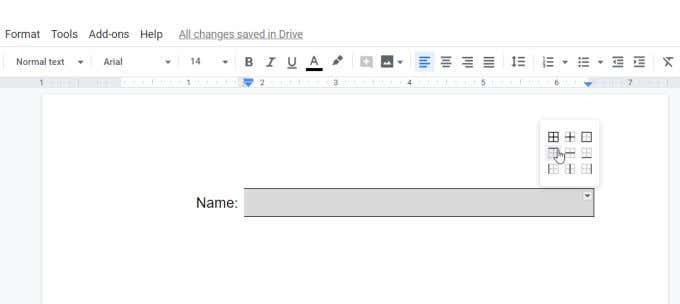
Select all of the fields, right click inside the selected area, and selectMerge cells.
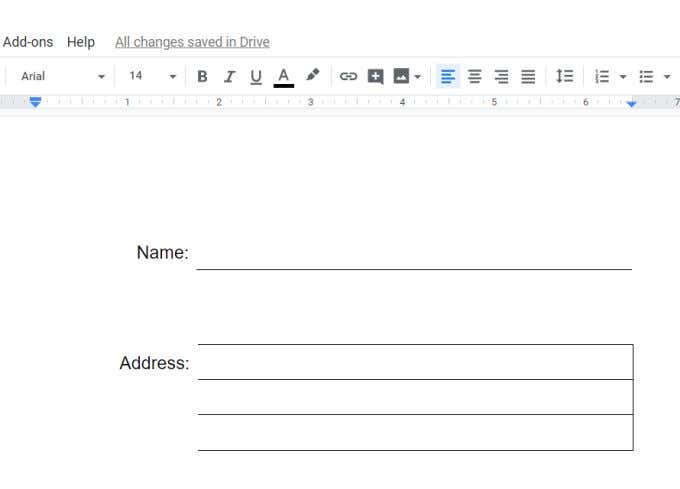
Next, you should probably create a border around the text area.
pick the 4-sided box icon.
This selects all four sides.
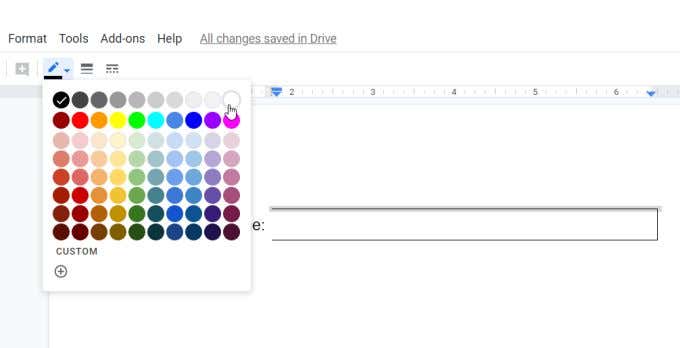
Next, grab the border color icon in the ribbon and choose black.
Remember to resize the cells so the label and the box align with the rest of the form.