Google Chromes autofill feature can save you time and effort.
It can automatically fill in details like passwords, addresses, phone numbers, and even credit card information.
So, without further ado, lets get right to it.

you’ve got the option to use the following steps on Windows and Mac.
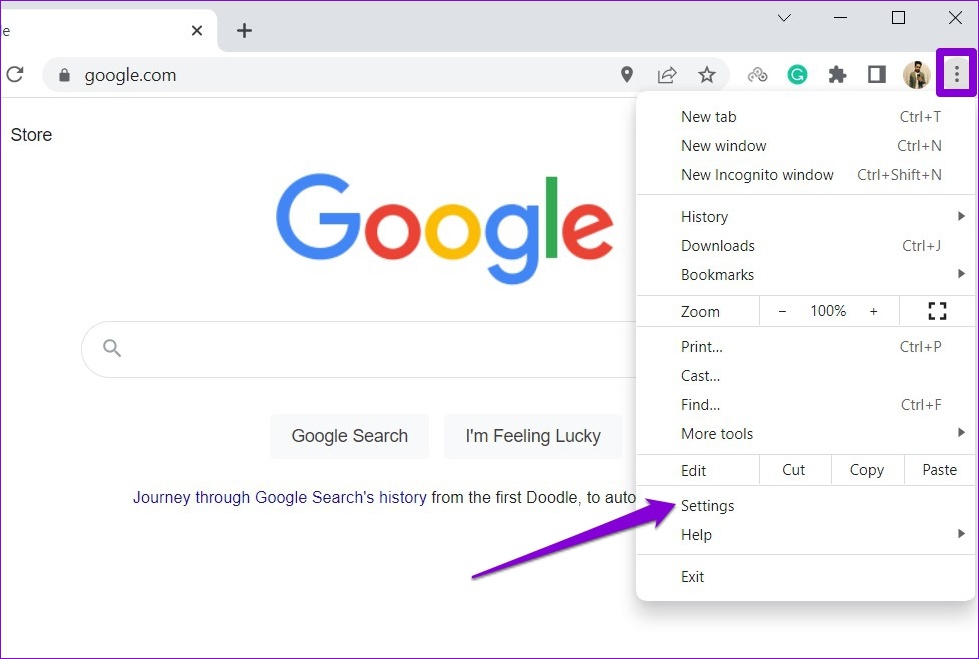
Step 1:Open Google Chrome on your PC.
press the three-dot menu icon in the top right corner and select configs from the list.
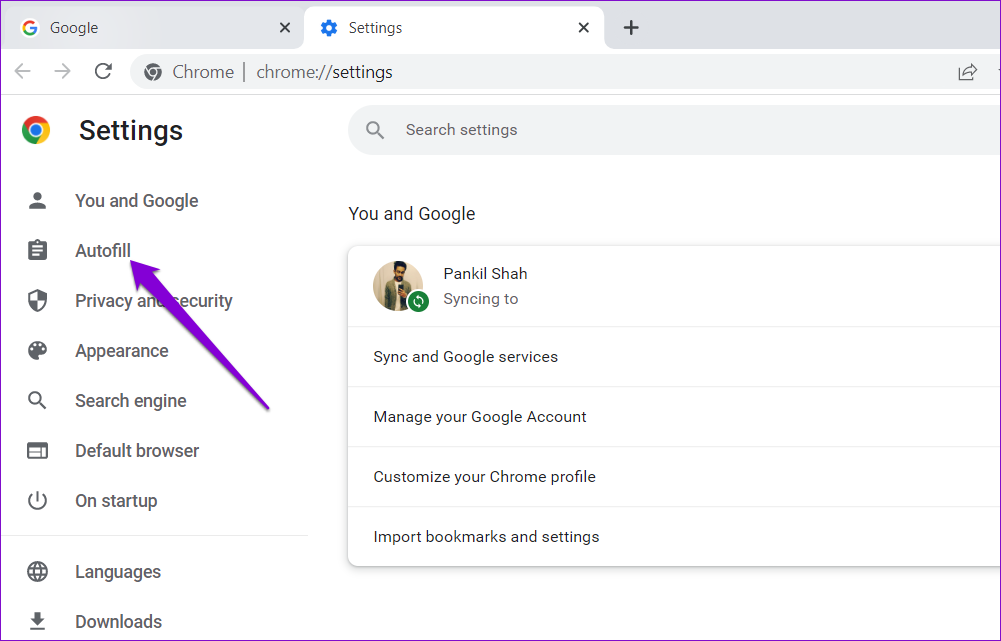
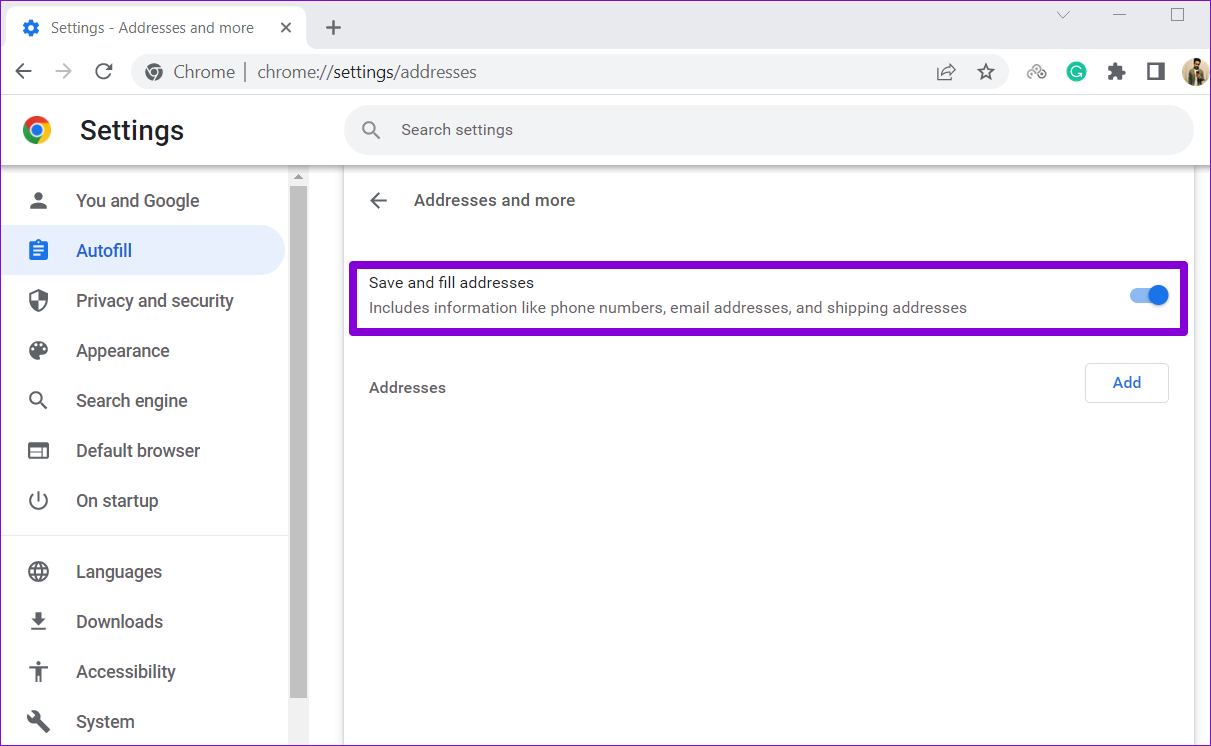
Step 2:choose Autofill from the left sidebar.
pick the autofill item youd like to enable or disable.
Enable or Disable Autofill for Passwords
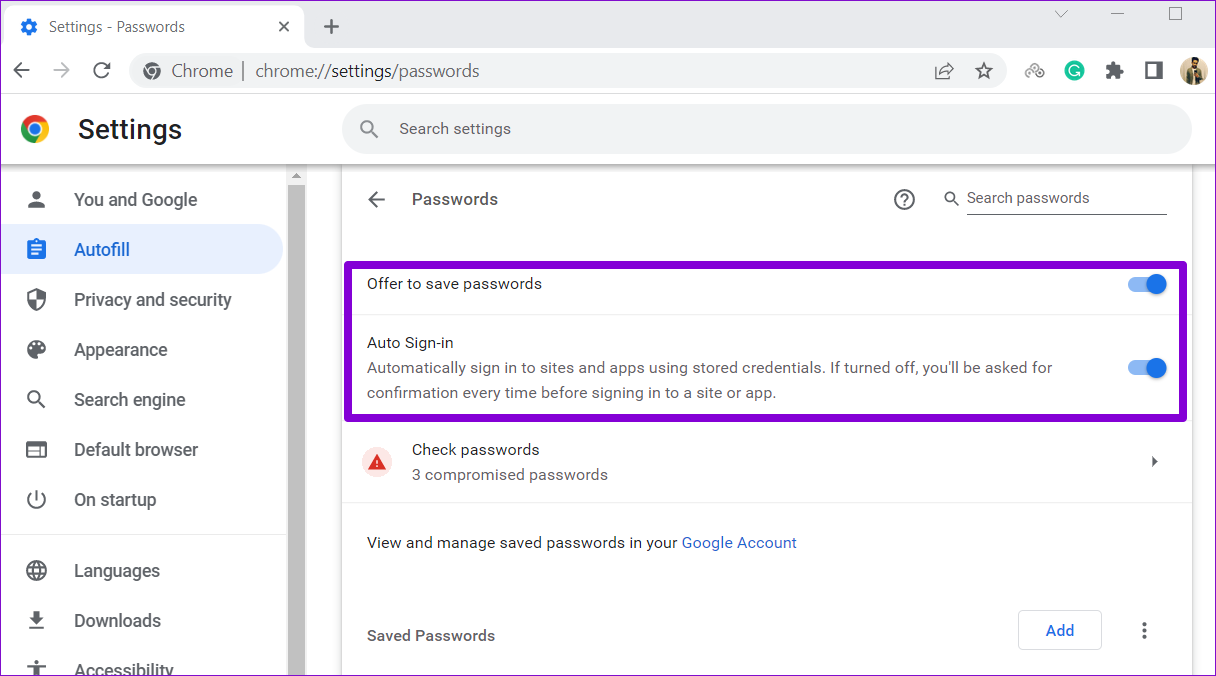
Let us first explore Passwords.
To enable autofill for Passwords, toggle on the switch next to Offer to save passwords.
Once you enable it, Chrome will offer anoption to save passwordswhenever you sign on to a site.
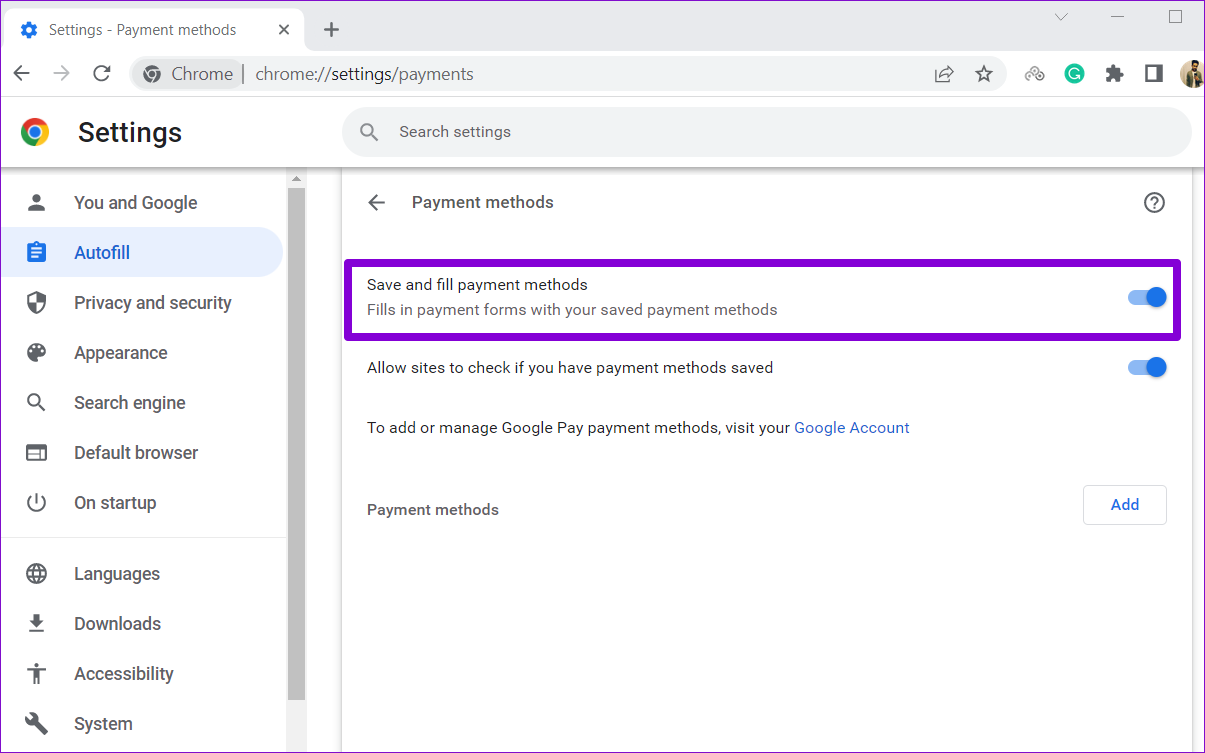
you’re free to use the Add button to stash your debit card or credit card details manually.

However, you’re free to always change that by modifying thesync tweaks in Chrome.
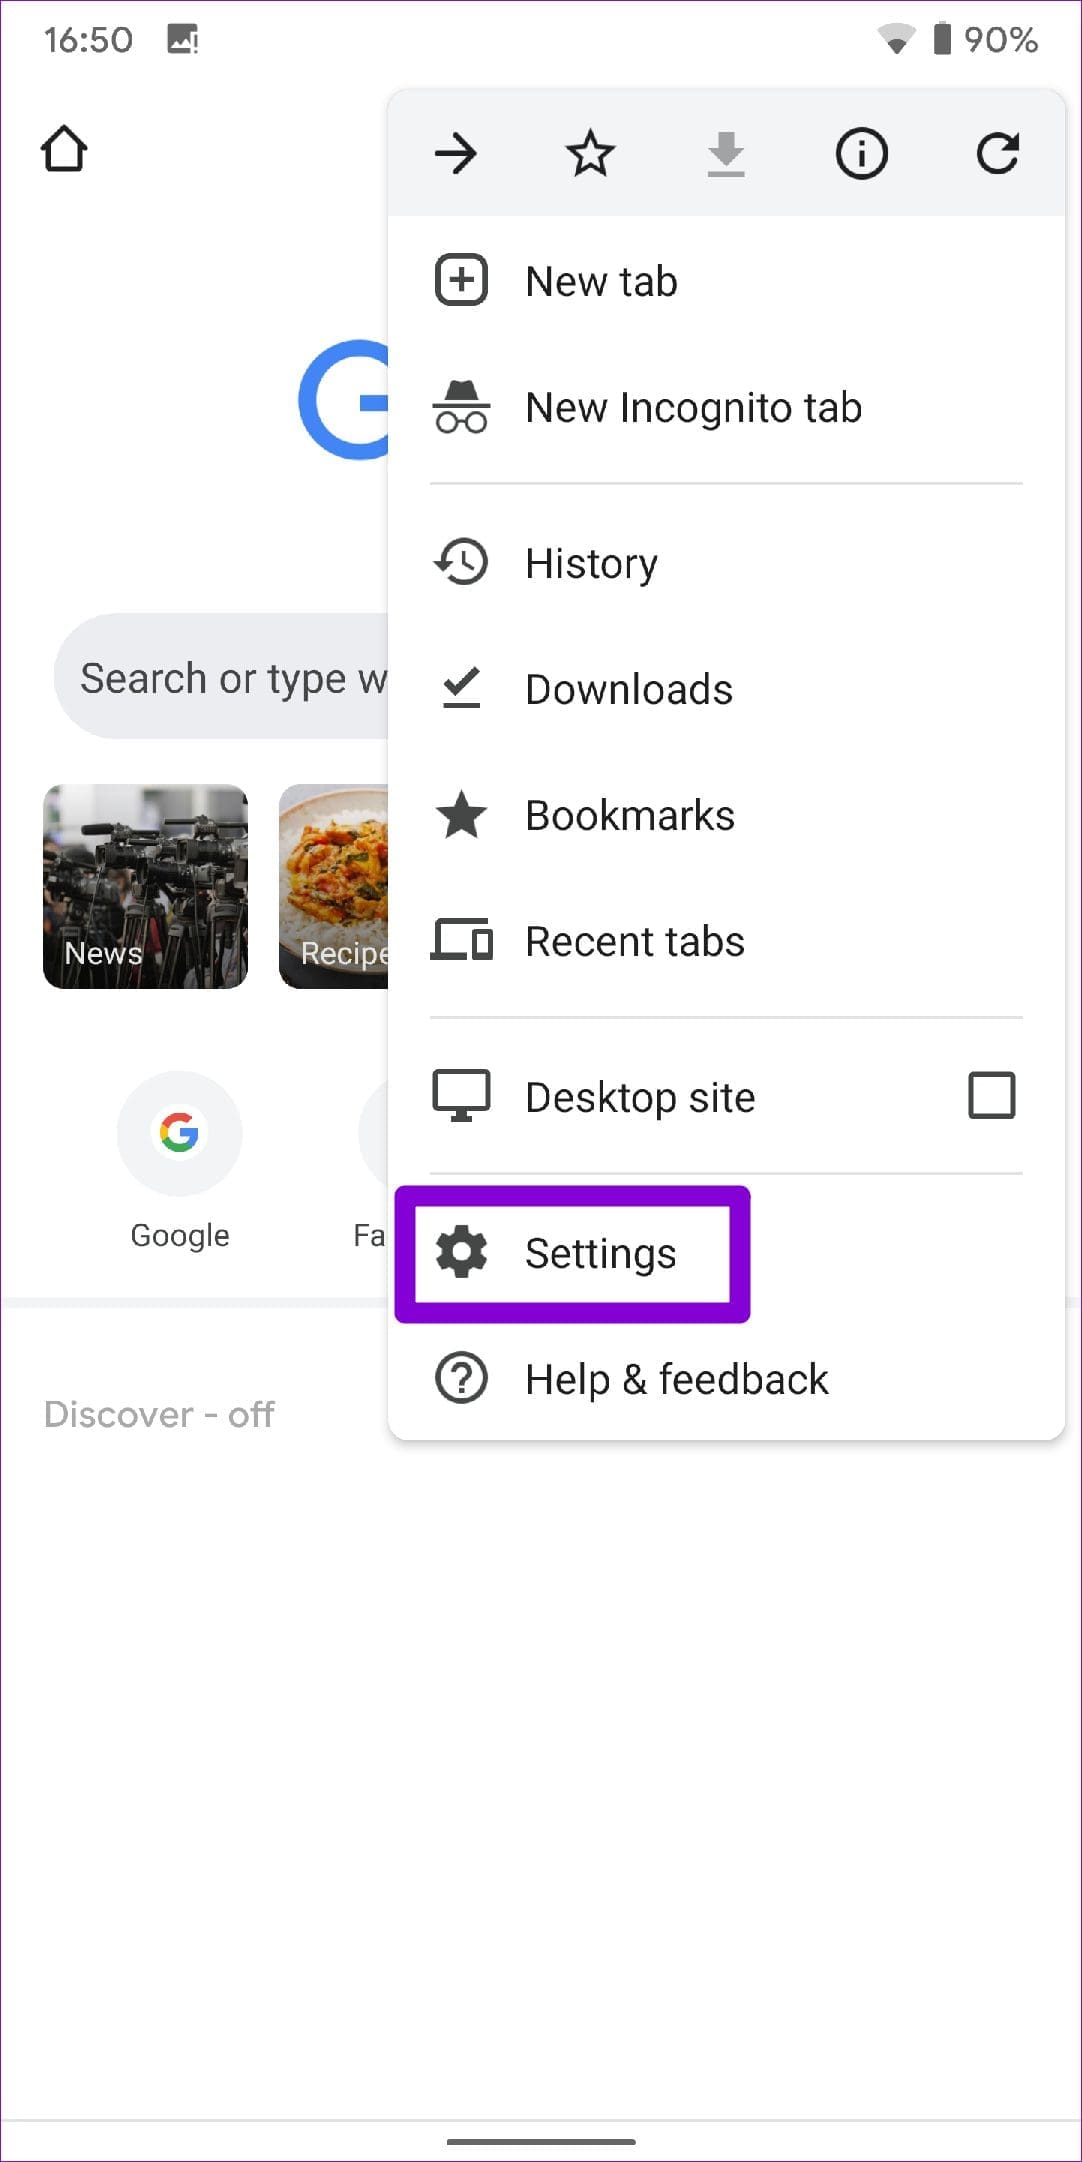
Step 1:Open Google Chrome on your phone.
Tap the three-dot menu icon in the top right corner and select controls from the list.
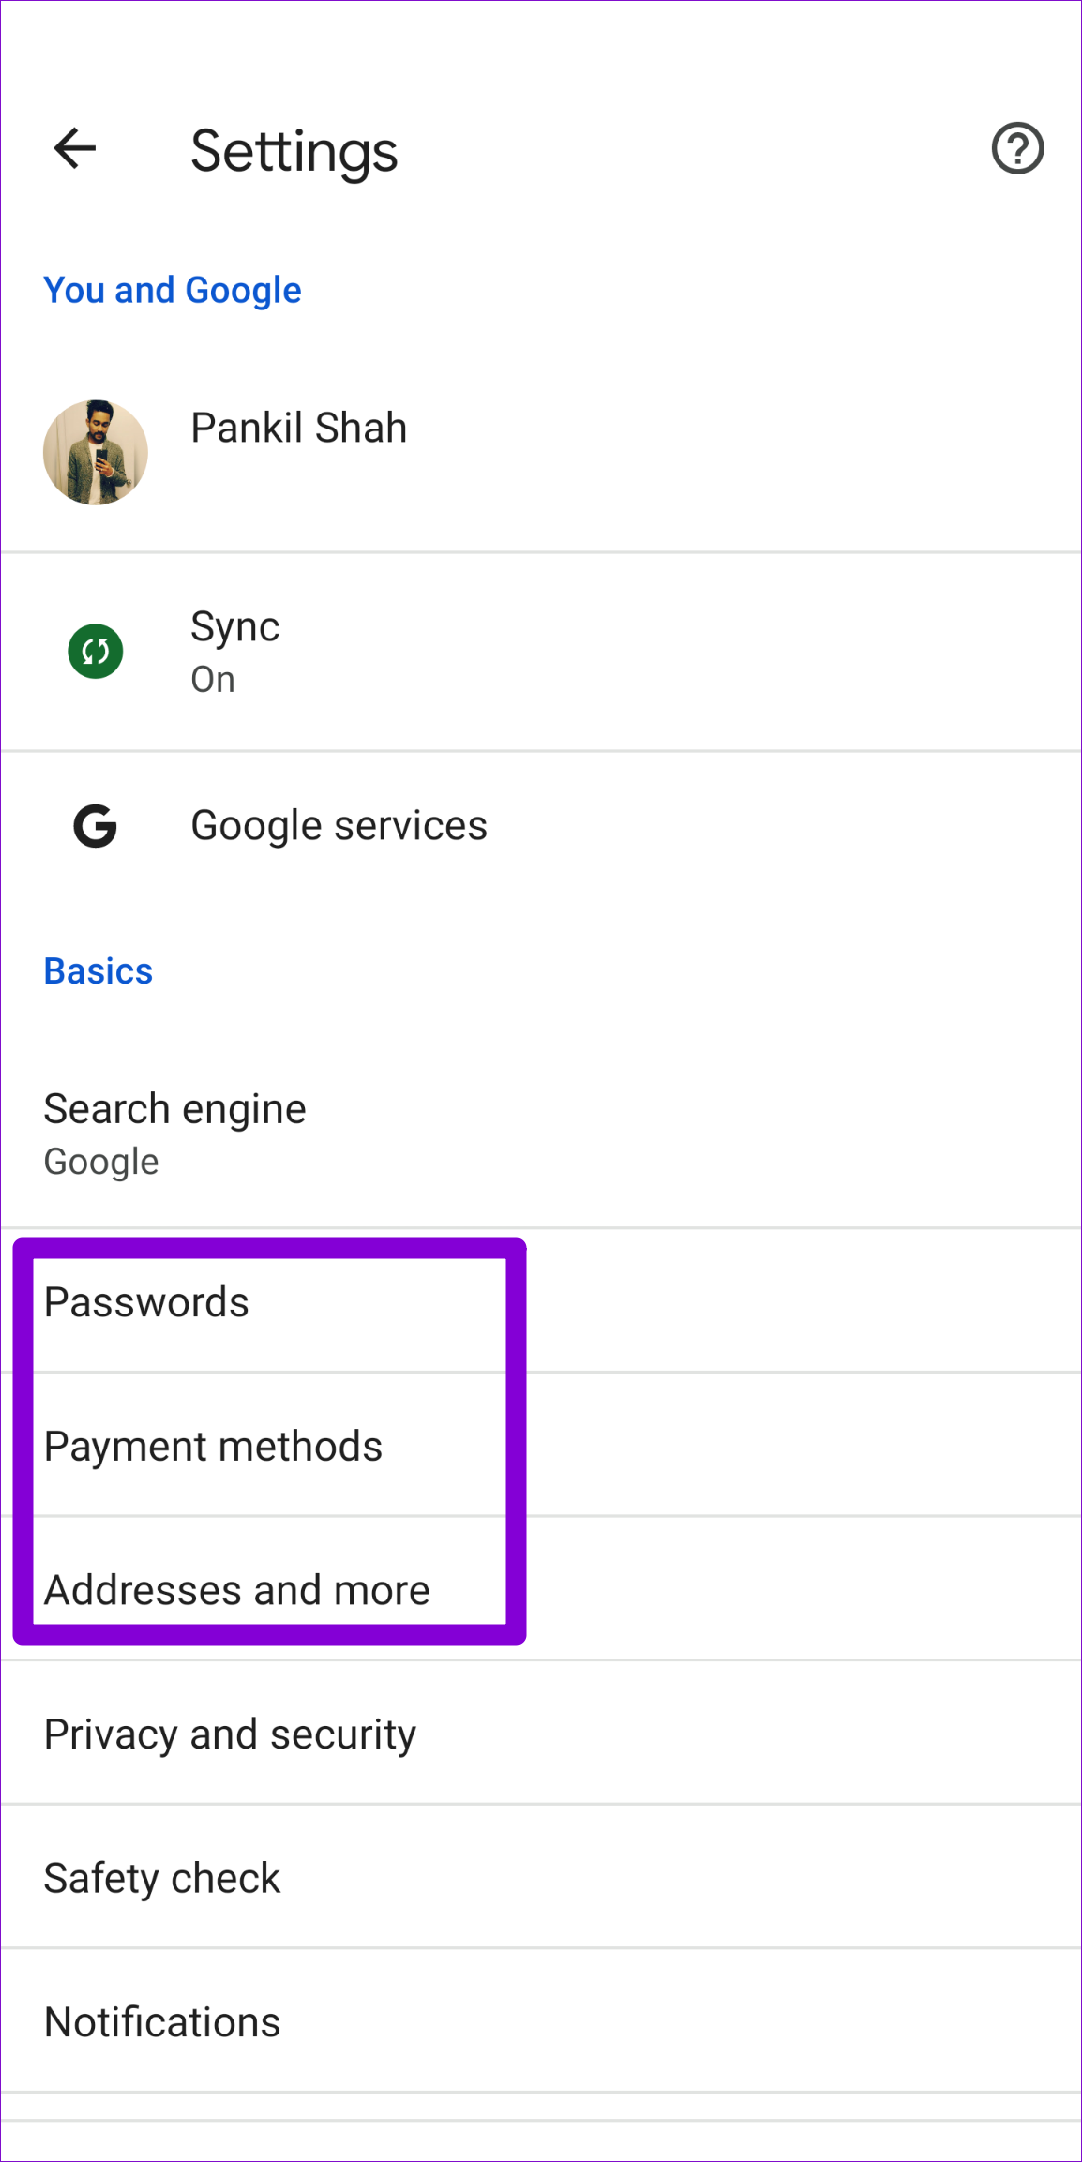
Lets see how you could configure them.
To configure autofill for passwords, go to Passwords and use the Save passwords toggle from the following menu.
All your saved passwords will appear under the Passwords section.
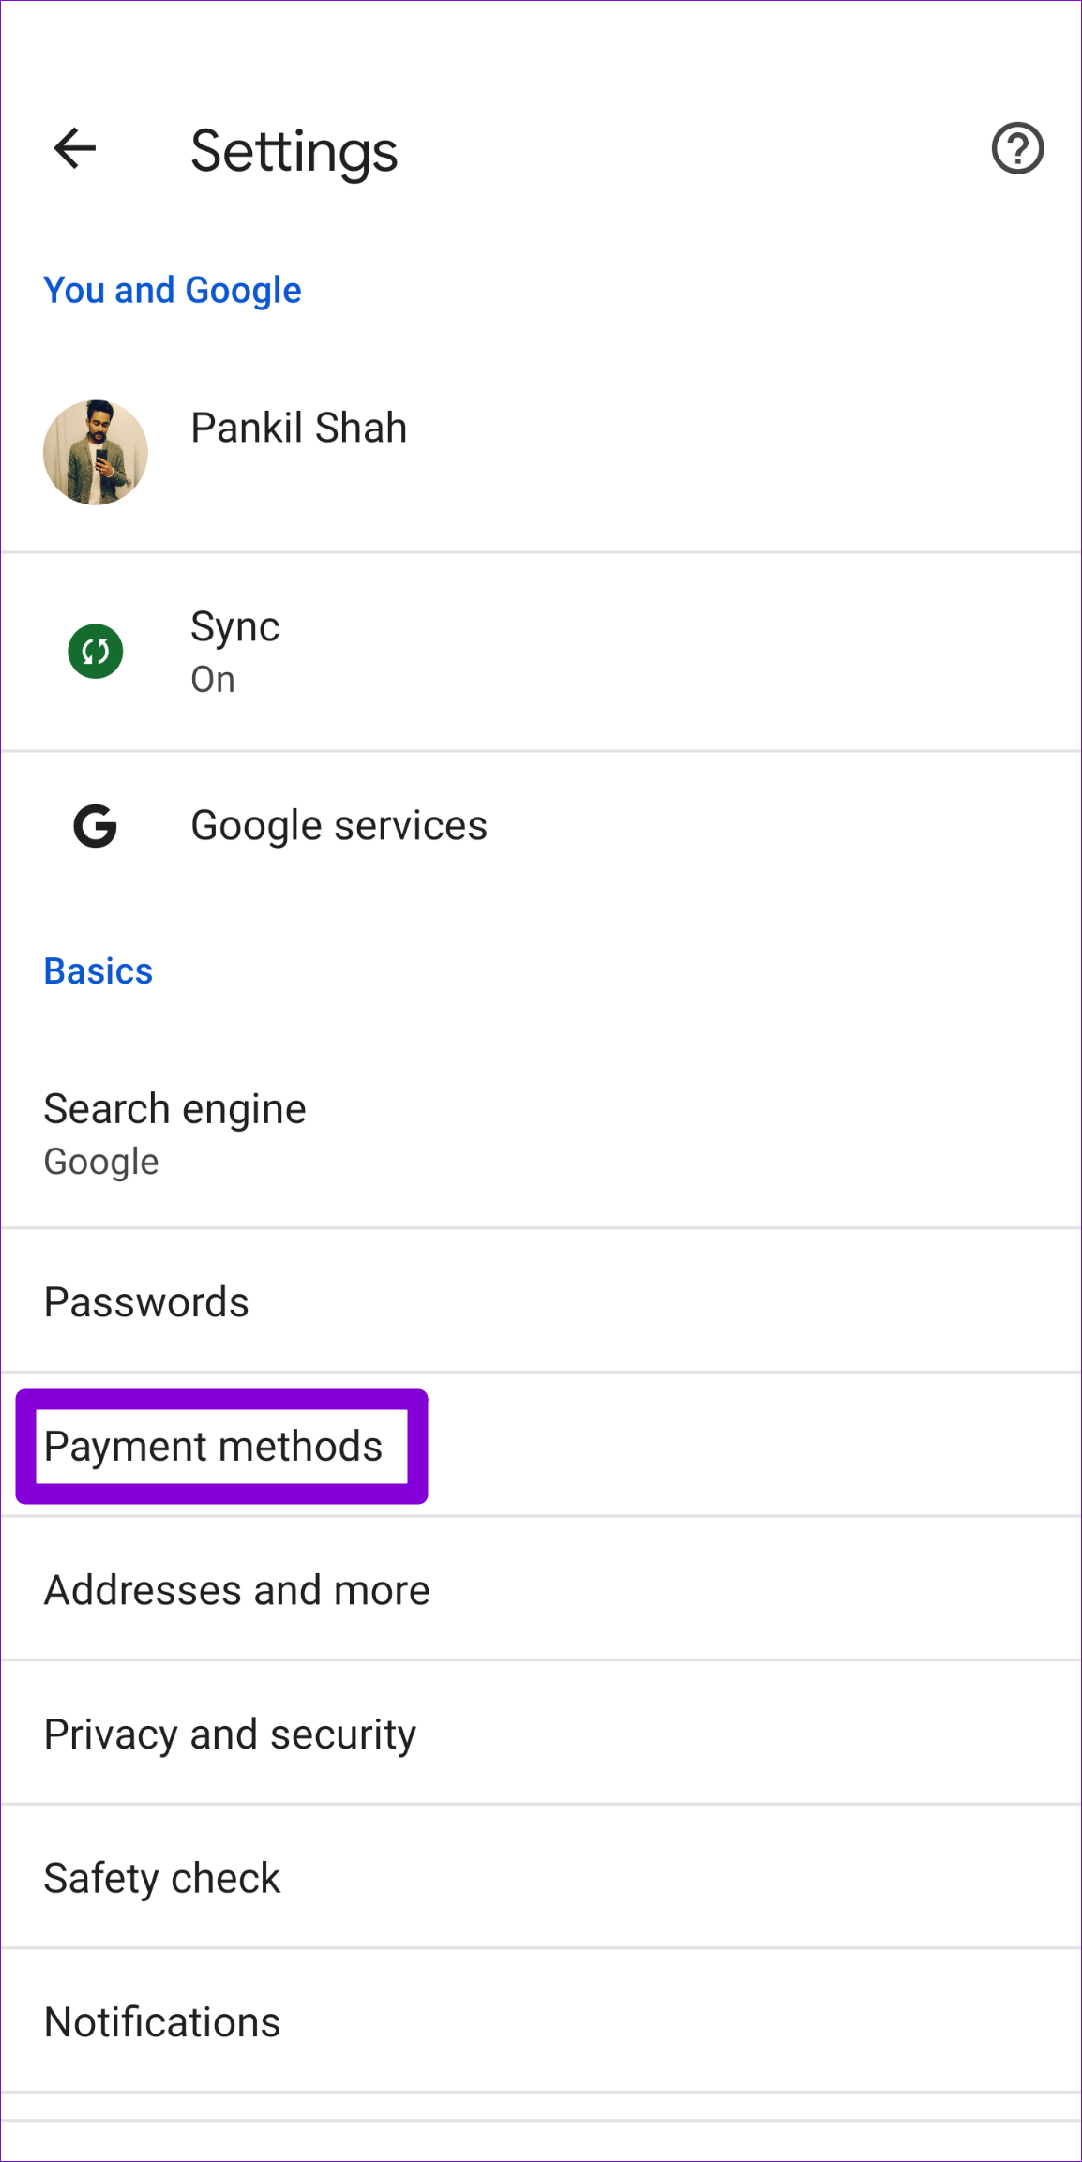
To enable or disable autofill for Payment methods, tap on the Payment methods on the configs page.
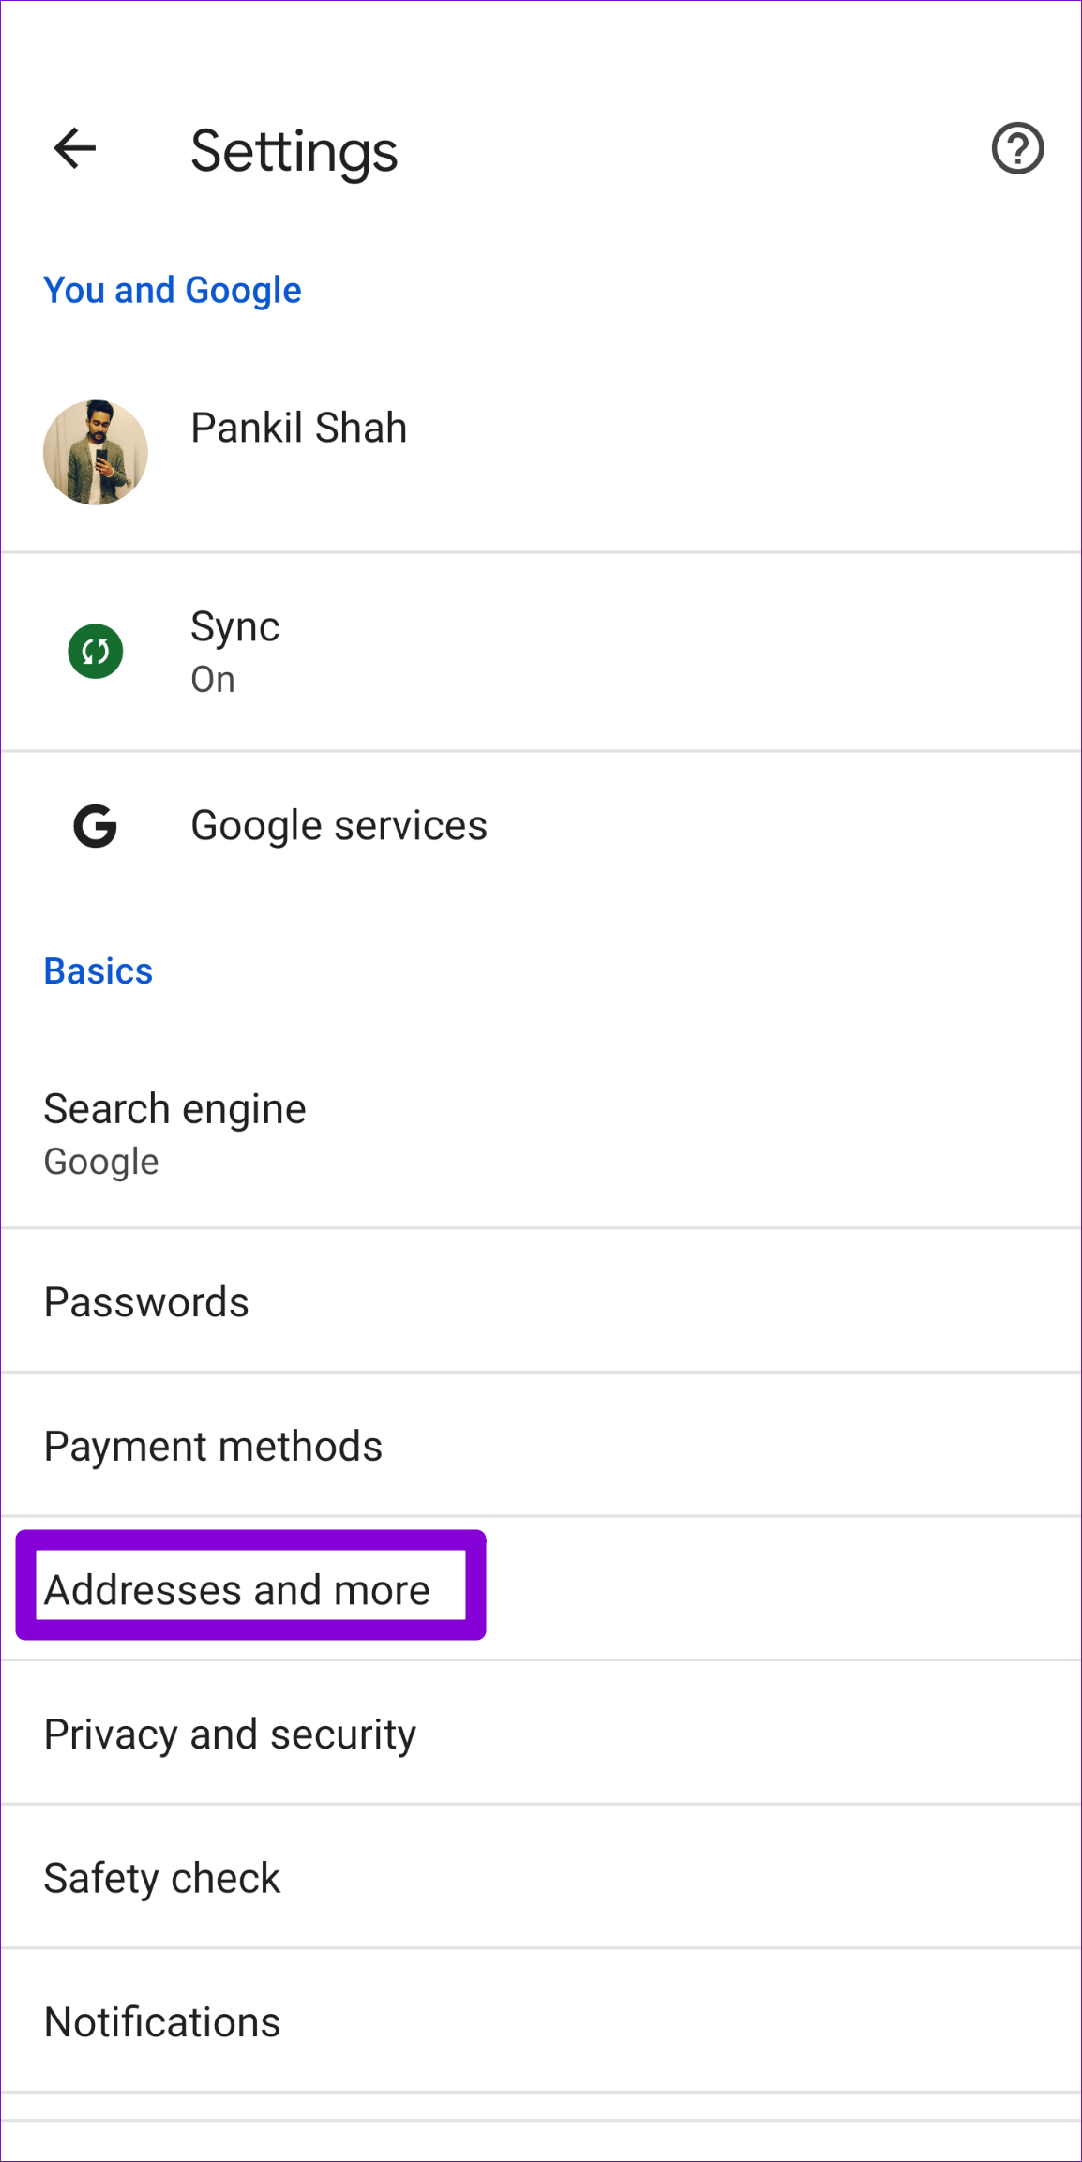
All your saved addresses, phone numbers, and email addresses will appear on this page.
Filling the Blanks
Using Chromes autofill feature can bring a lot of convenience to the table.
It not only speeds up form filling, but it alsoremembers passwords for all of your favorite websites.
Plus, enabling or disabling autofill is quite simple, whether using Google Chrome on your PC or phone.
Was this helpful?

The content remains unbiased and authentic and will never affect our editorial integrity.