You wont have to enter such details again while visiting the same websites manually.
Ensure your devices trigger the latest Google Chrome version.
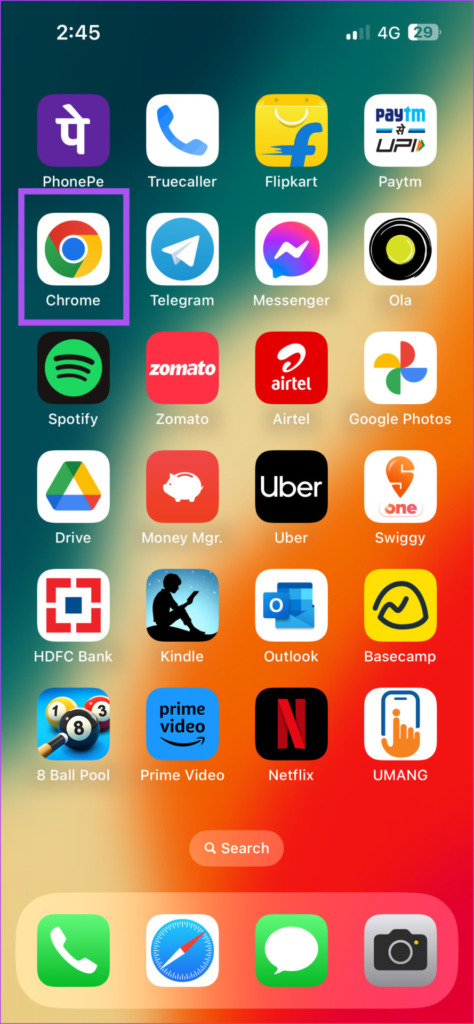
Step 2:For iPhone, tap on your profile icon at the top-right corner to open controls.

For Android, tap the three vertical dots at the top-right corner and select configs.
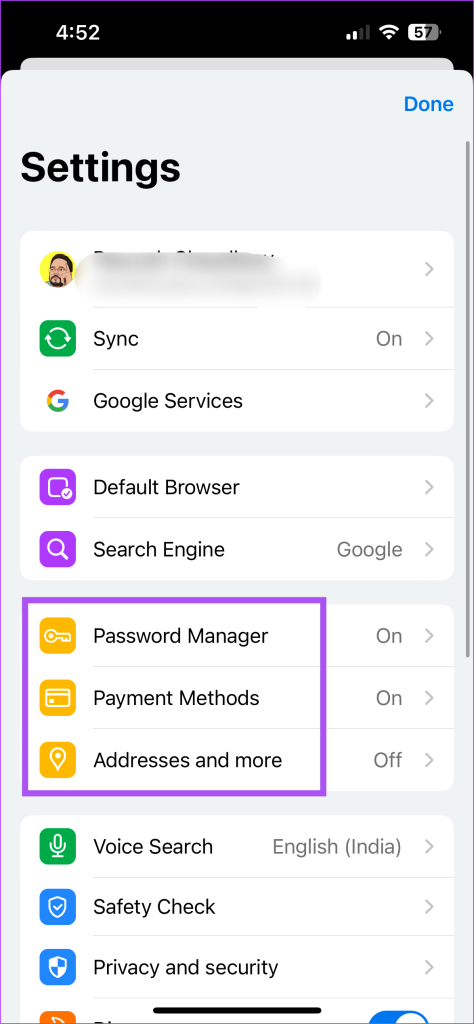
Step 3:Tap on Password Manager.
Step 5:Tap on tweaks at the bottom-left corner.
Step 6: Tap the toggle next to Offer to Save Passwords.
Tap on Done to confirm.
Step 7:Tap on Done again at the top-right corner to add your Autofill configs for passwords.

Google Chrome will automatically ask to stash your passwords.
For Android, tap the three vertical dots menu at the top-right corner and select prefs.
Step 3:Tap on Addresses and More.

Step 4:Tap the toggle next to Save and Fill Addresses.
Your address will be saved in Chrome and added automatically when you visit a website next time.
you’re free to tap the toggle again to turn off autofill in Google Chrome for addresses.

For payment methods, refer to our post onhow to add payment methods in Chrome on Mobile and Desktop.
Step 2:Open tweaks as per your equipment.
Step 3:snag the Autofill category from which you want to clear your data.

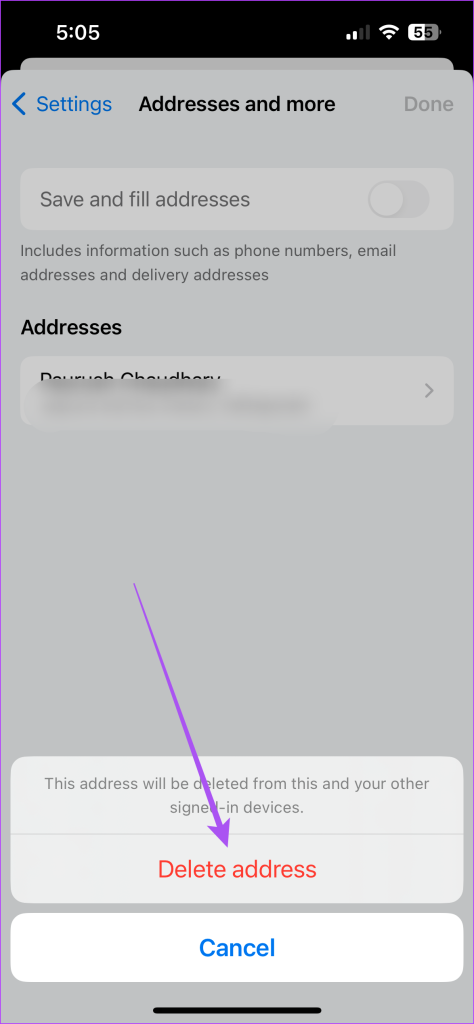
Step 4:Swipe left on the Autofill data and tap on Delete on the right side.
Step 5:Tap on Delete again to confirm.
Step 1:Open Google Chrome on your Mac or Windows PC.

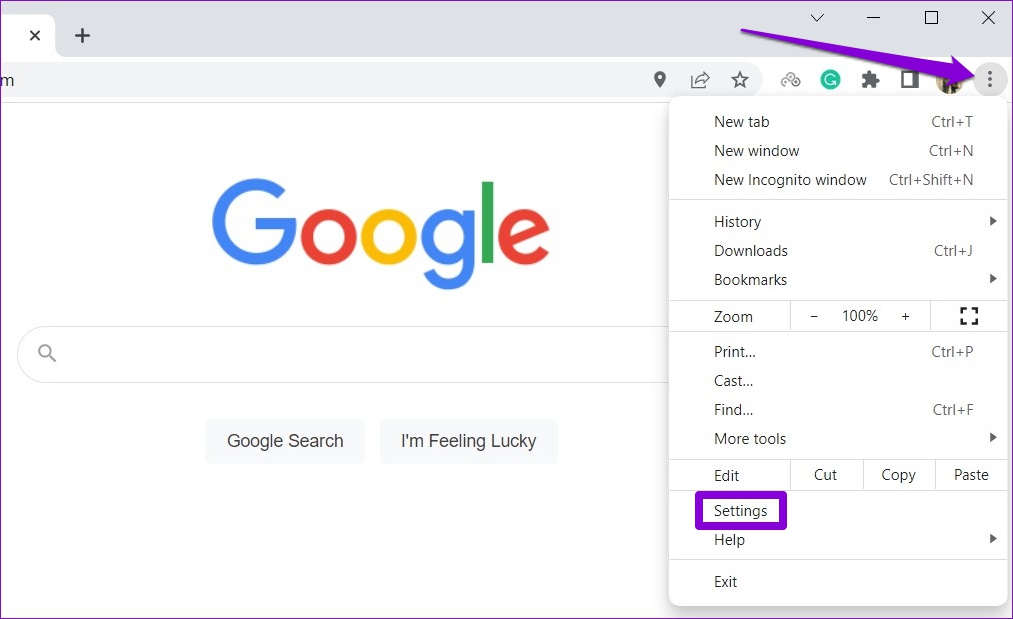
Step 2:poke the three vertical dots at the top-right corner and select controls.
Step 3:Select Autofill and Passwords from the left menu.
Step 4:hit Password Manager.

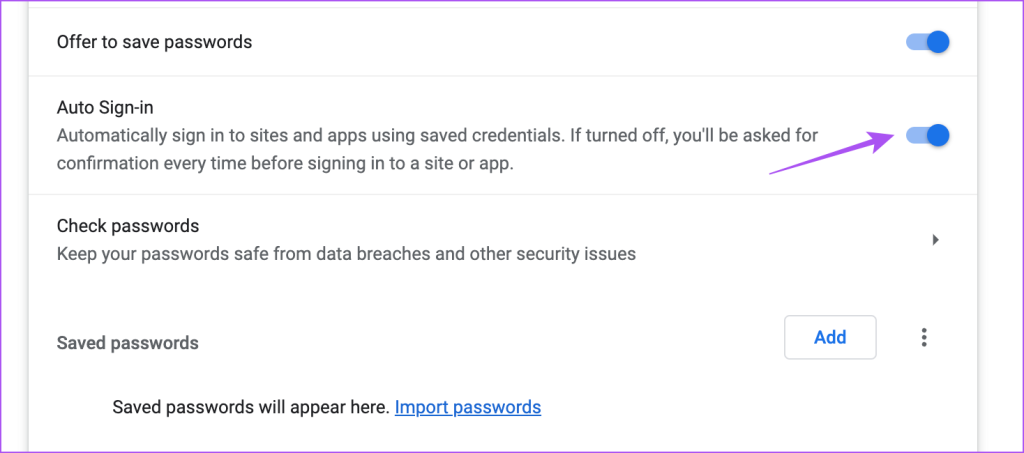
Step 5:hit the toggle next to Offer to Save Passwords.
Step 6:opt for toggle next to Auto Sign-in to enable autofill.
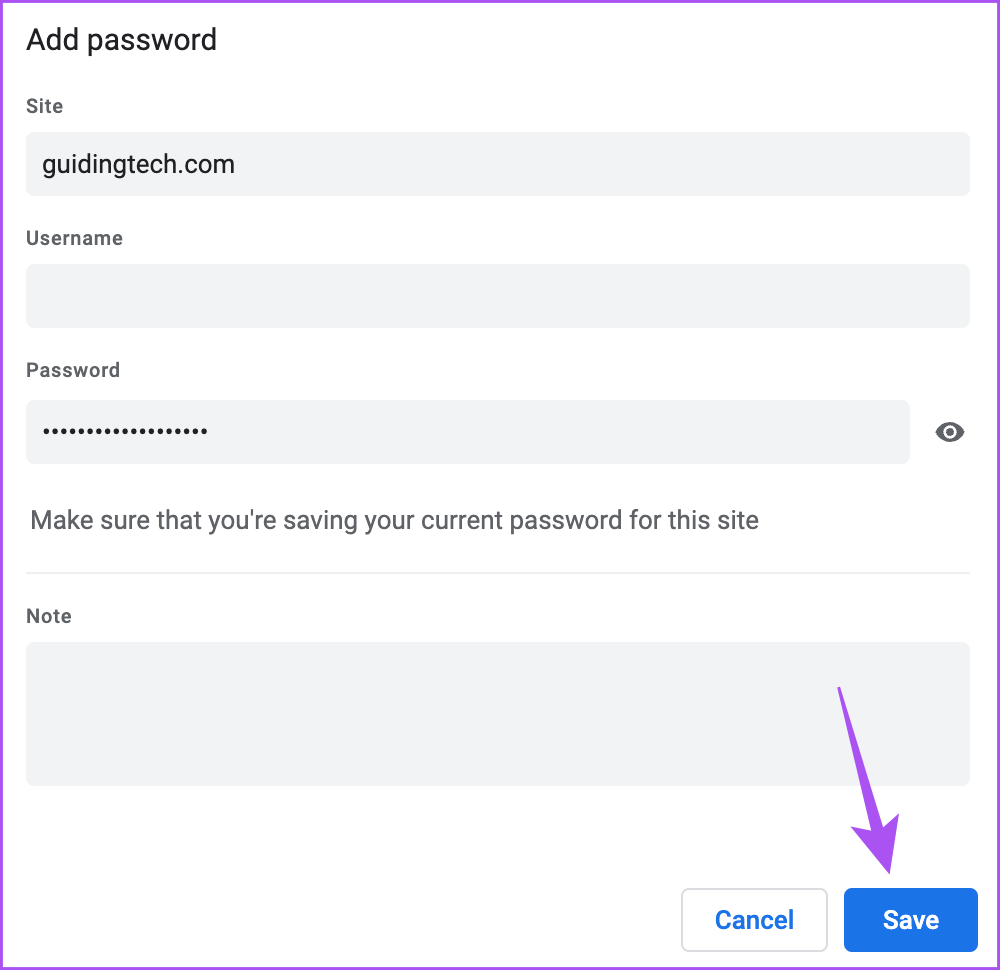
Step 7:tap on Add to add your website password.

Step 8:After adding your password and website details, punch Save.
Step 1:Open Chrome on your Mac or Windows PC.
Step 2:hit the three vertical dots in the top-right corner and select tweaks.

Step 3:tap on Autofill and Passwords.
Step 4:select Addresses and more.
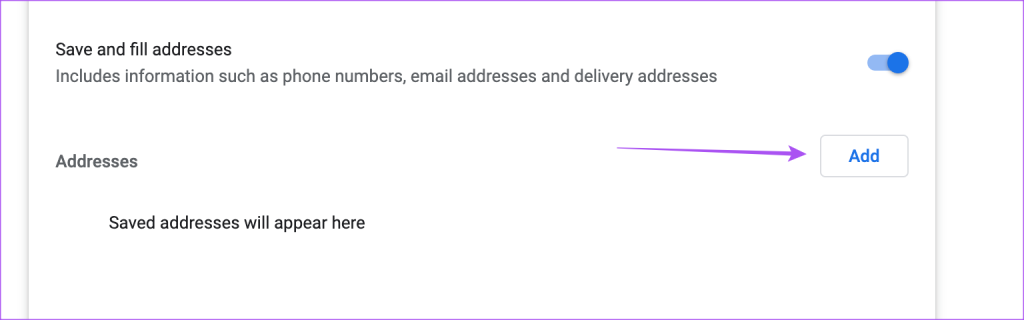
Step 5:tap the toggle next to Save and Fill Addresses.
Step 6:choose Add.
Step 7:Add your address for Autofill and punch Save.
Step 2:hit the three dots in the top-right corner and select options.

Step 3:hit Autofill and Passwords from the left menu.
Step 4:Select any category of autofill data.
Step 5:hit the saved info that you want to remove.
Step 6:put in your Mac password to authenticate.
Step 7:choose Delete to remove it.
Was this helpful?

The content remains unbiased and authentic and will never affect our editorial integrity.