Skipping this step can lead to errors, poor quality, or even failed exports.
Finalize Your Edit
Start by reviewing your timeline thoroughly.
Check for any unfinished sections, misplaced transitions, or missing audio.
Filmora 2025s intuitive interface makes it easy to spot and fix these issues.
Optimize File Size
Large video files can be challenging to share and upload.
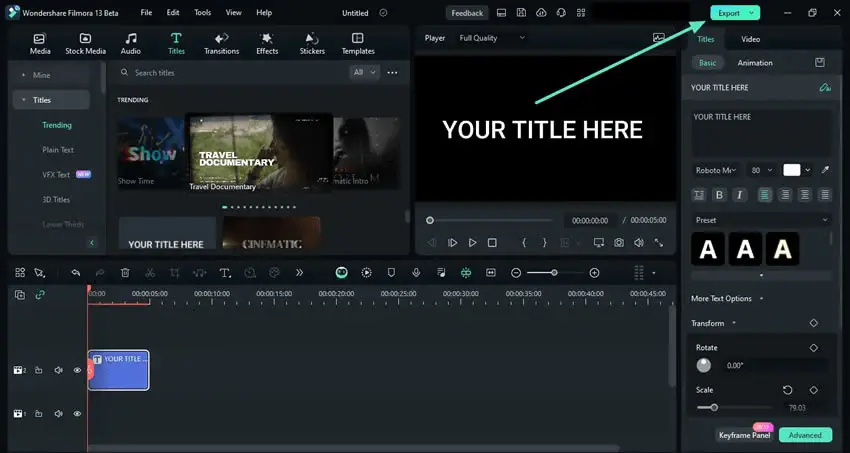
Filmora 2025s export menu is designed to be straightforward, even for beginners.
Clicking it opens a dropdown menu with various export options.
However, if youre working on a professional project, consider using MOV for higher quality.
Adjust Resolution and Bitrate
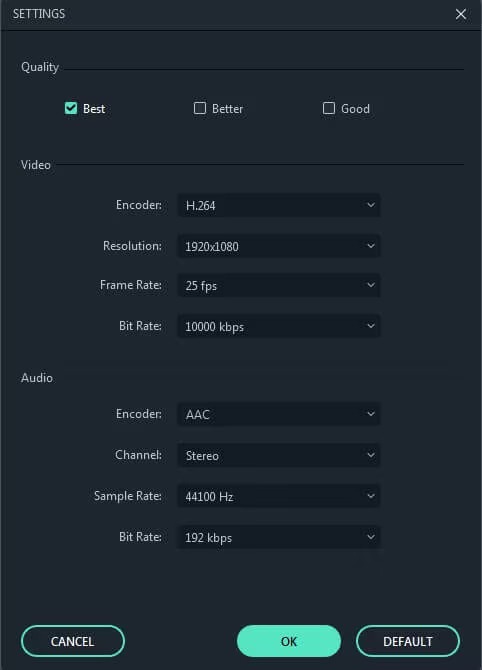
Resolution and bitrate directly impact your videos clarity and file size.
Set the audio bitrate to at least 320 kbps for clear, crisp sound.
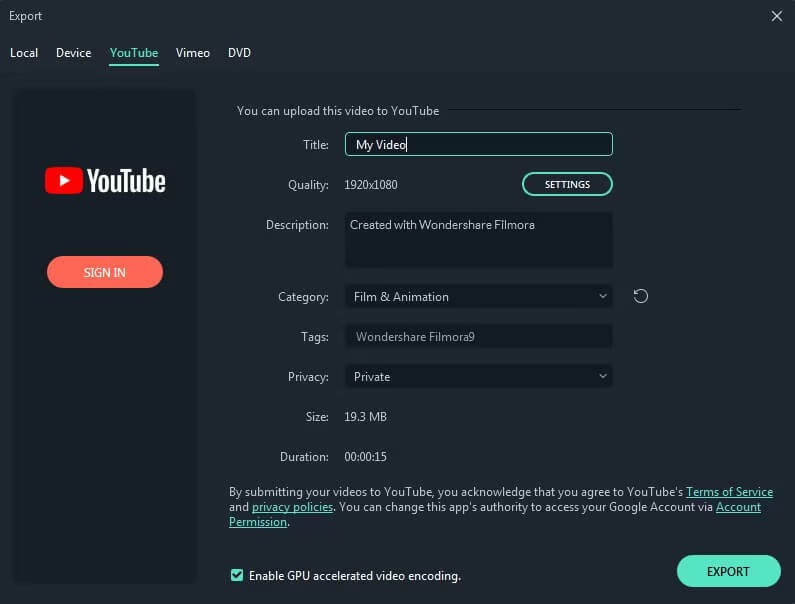
Step 4: Exporting for Specific Platforms
Different platforms have unique requirements.
Batch Export
Export multiple projects or clips simultaneously to save time.
This is especially useful for creators managing multiple videos.
Hardware Acceleration
Enable GPU acceleration in Filmora 2025 to speed up export times.
This feature leverages your computers graphics card for faster processing.
Custom Export Presets
back up your preferred export tweaks as custom presets for future projects.
This ensures consistency and saves time.
Step 6: Troubleshooting Common Export Issues
Even with the best preparation, issues can arise.
Choosing the Right File Location
keep your video to a dedicated folder for easy access.
Consider using an external SSD for large files.
This feature saves time and streamlines your workflow.
Double-check:
Rendering the Timeline
Rendering your timeline allows you to preview the video without lags.
The duration depends on the video length and system performance.
