Completely closing the NVIDIA Control Panel system and restarting it can fix the issue.
Step 1:Press theCtrl + Shift + Esckeyboard shortcut to open Task Manager.
Step 2:hit thesearch bar, typeNvidia,and pressEnter.
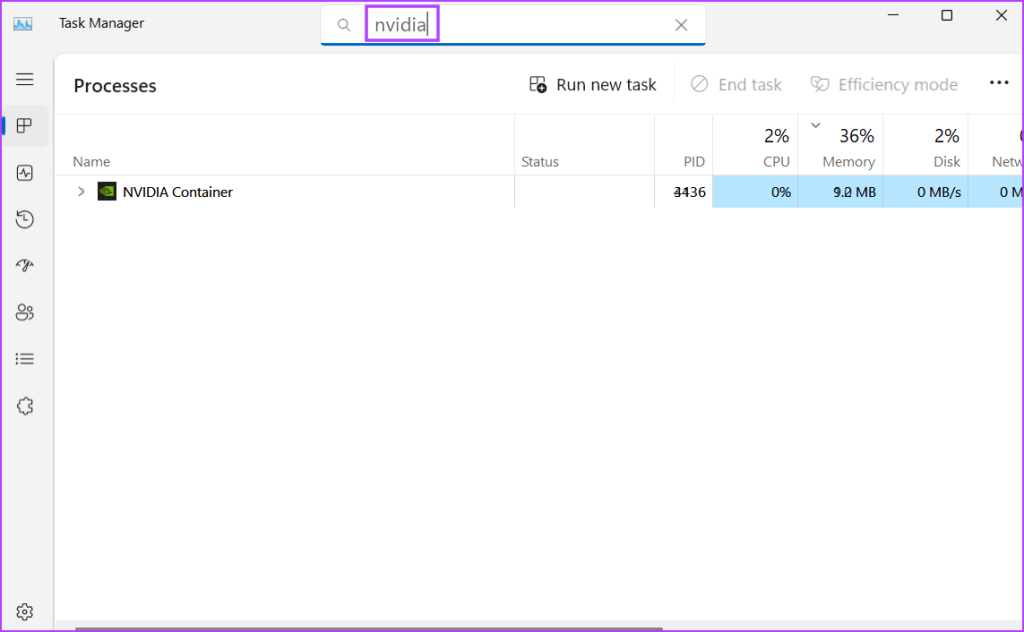
It will list all the active NVIDIA processes.
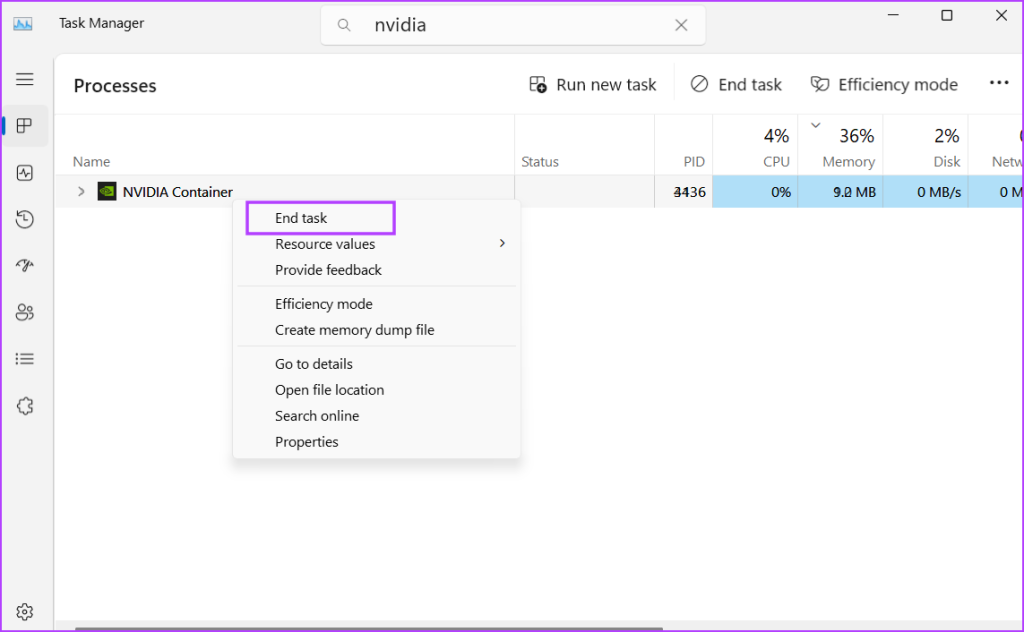
Step 3: Right-clickon one such active NVIDIA process and click onEnd task.
Repeat the above step for all NVIDIA processes and terminate them.
exit the Task Manager and re-pop pop the NVIDIA control panel.
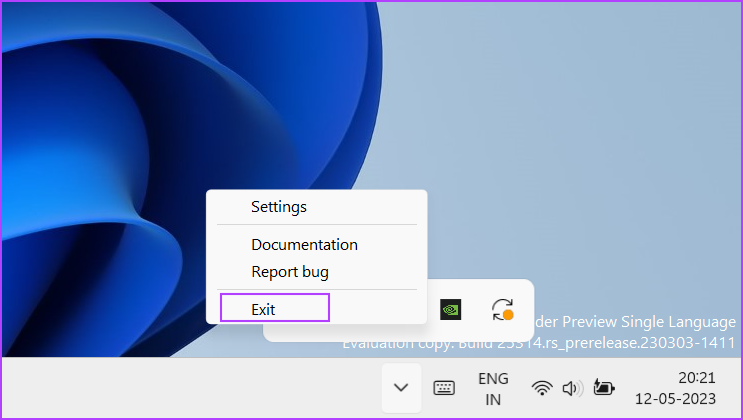
Step 1:Go to theright sideof the Taskbar > select theupward arrowicon.
Step 2: Right-clickon an active app icon > click onExit.

Step 3:Repeat this step for all applications you dont need while playing the game.
Dont wrap up the NVIDIA Control Panel from the system tray.
If this service encounters a glitch, you will face issues while launching GPU-bound tasks.
So, check and restart it using theServicesprogram.
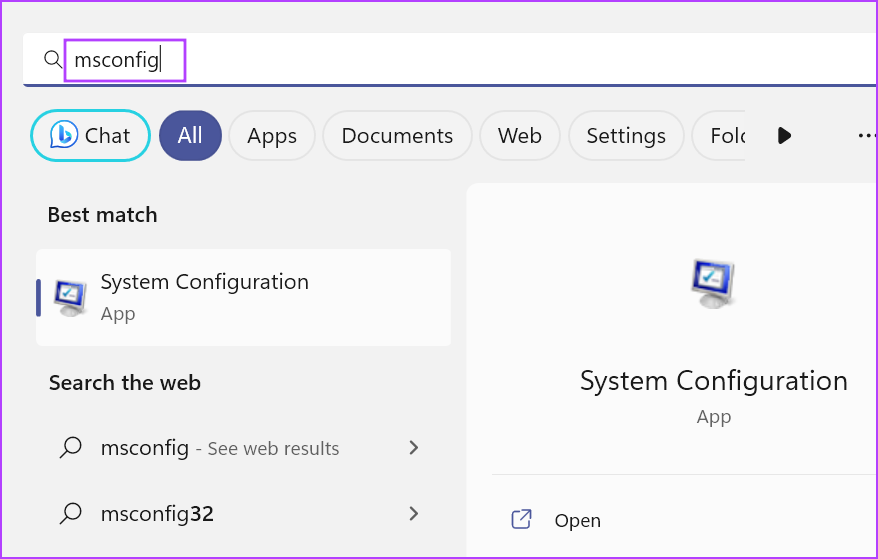
Step 1:Press theWindows keyto fire up the Start menu, typeservicesin the search bar, and pressEnter.
Step 2:In the Services window, locate and right-click onNVIDIA Display Container LS> selectRestart.

Step 3:Close theServices utility.
Modern laptops automatically switch to the discrete NVIDIA or AMD GPU for heavy tasks like games.
But if it fails to do so, you will have to manually switch to the GPU.

Step 2:NVIDIA Control Panel will launch.
Go to the left-hand side menu and click onManage 3D controls.
Step 3:Go toPreferred Graphics Processorand tap on thearrow buttonto expand the drop-down list.

Step 4:Click onApply.
kill the NVIDIA Control Panel app.
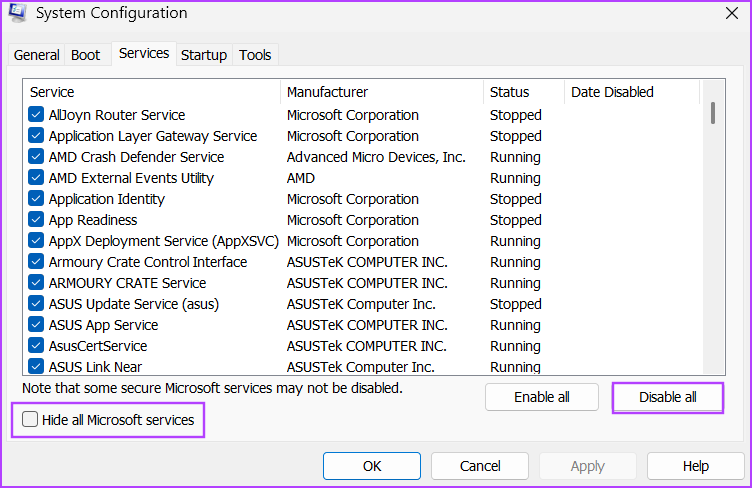
Step 2:Switch to theServicestab.

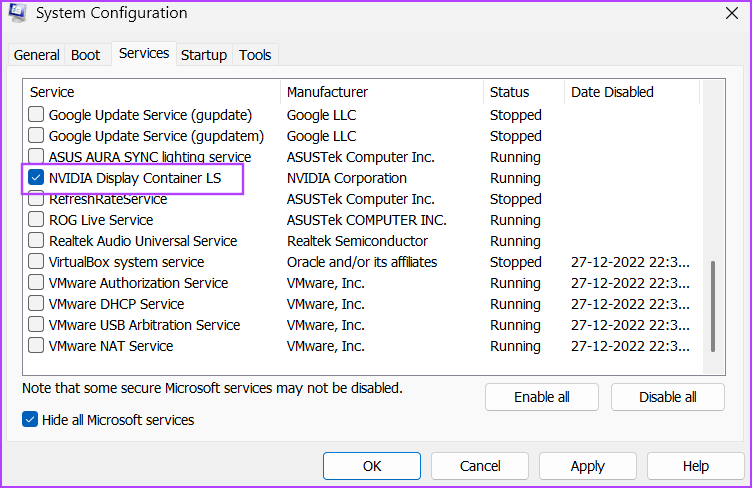
Step 3:Check theHide all Microsoft servicesbox > click onDisable all.
Step 4:Locate theNVIDIA Display Container LSservice and choose the checkbox toenableit.
Step 5:punch theStartuptab >Open Task Manager.
Step 6: Right-clickon a program from the list and selectDisable.
This program will not run when you boot Windows the next time.
Step 7: Repeatthe same process for all third-party apps anddisablethem.

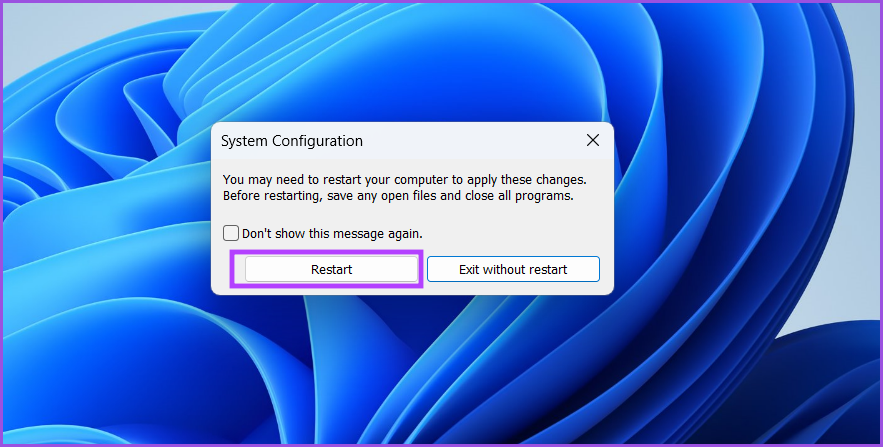
Step 8:Return to theSystem Configurationtool window.
Click onApply>OK.
Step 9:A pop-up window will open.
Windows will boot with essential Microsoft drivers and NVIDIA Display Container LS service only.
If you dont see any error while launching a game, an existing app conflicts with the service.
Enable services related to one program and perform a clean boot again.
Repeat this process until you identify the culprit program and disable or remove it from your box.
However, the new drivers often cause errors and game launch issues.
If you notice an error after recently updating the NVIDIA driver, roll back to the previous version.

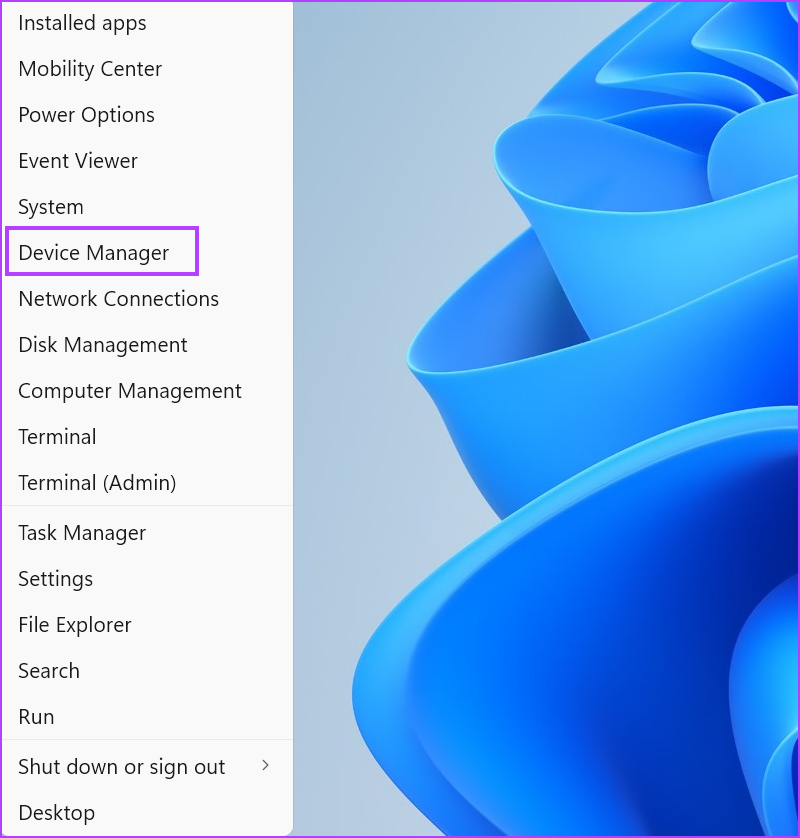
Step 1:Right-tap on theStart buttonto pop fire up Power User menu.
Step 2:Expand theDisplay adapterssection > double-click onNVIDIA GPUto open itsProperties.
Step 3:Switch to theDrivertab > click onRoll Back Driver.

Step 4:Wait for the utility to roll back the GPU drivers.
Close unit Manager andrestartyour system.
Additionally, ensure youupdate your Windows PCto the latest OS version for a bug-free experience.

Was this helpful?
The content remains unbiased and authentic and will never affect our editorial integrity.