Set Up Live Captions
Step 1: Open theSettings> scroll down and tap onAccessibility.
Step 2: TapLive Captionsunder the Hearing section.
Step 3: Toggle onLive Captions (Beta).
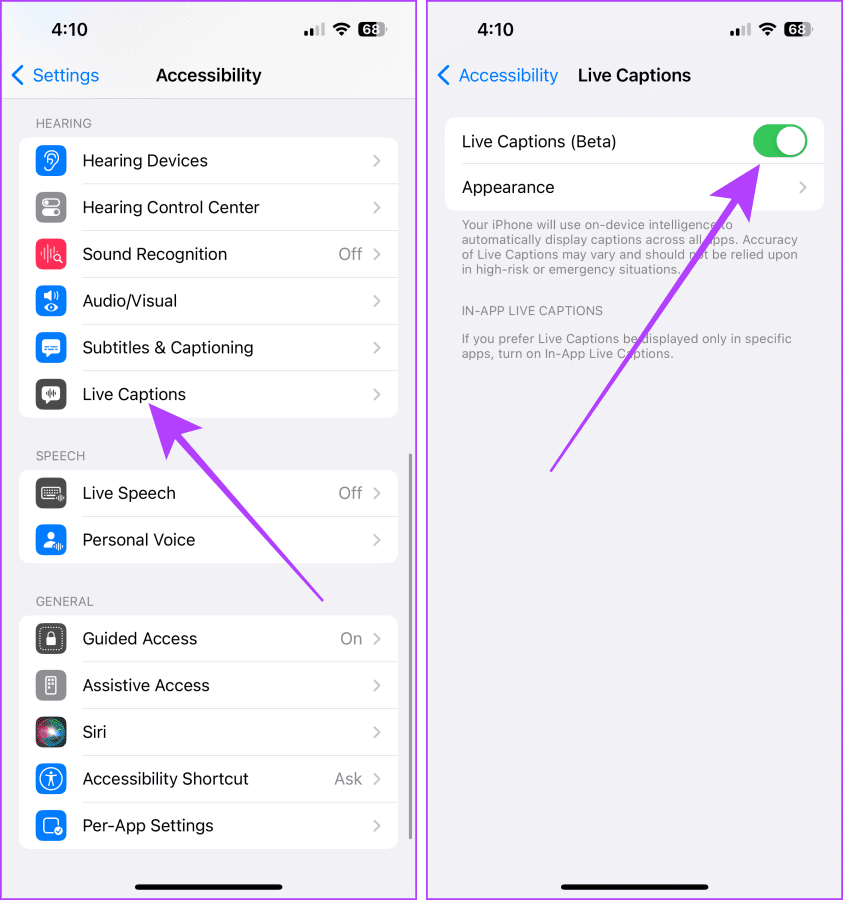
Note: To customize the text, size, and color of the captions, tap Appearance.
Transcribe Voice Memos
Step 1: Open theVoice Memosapp.
you’re able to record a new memo or transcribe an existing one.
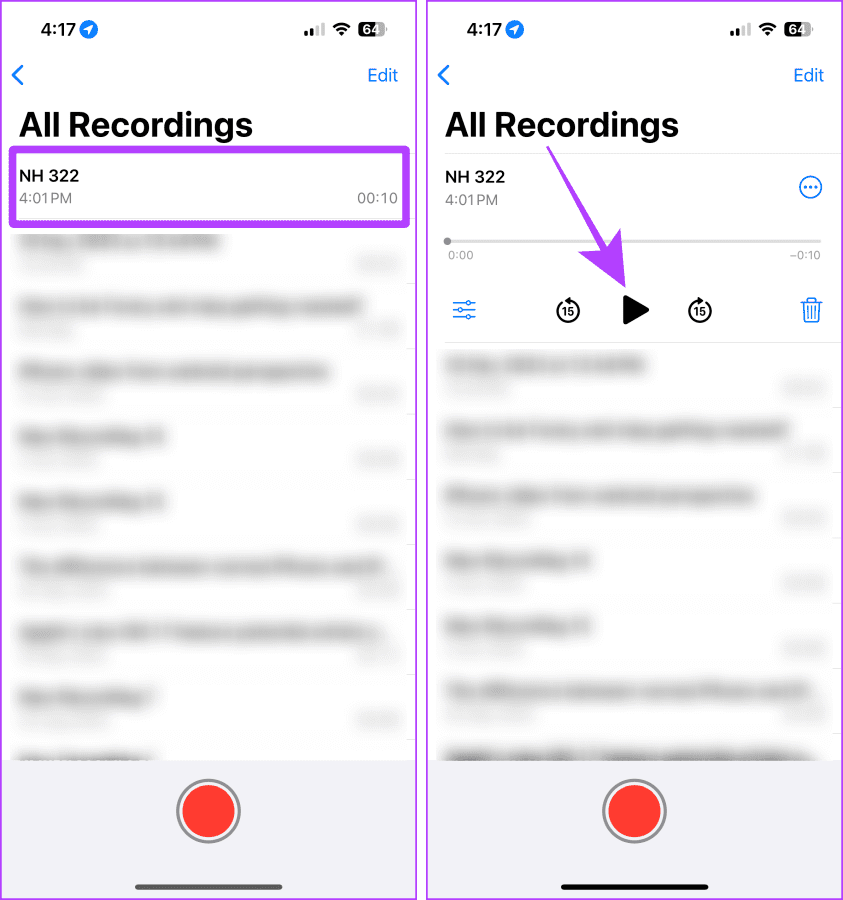
Step 2: Tap thevoice memoyou want to transcribe to expand it > hit theplay button.
Step 3: Thats it.
The transcription will appear on your screen in a floating window.
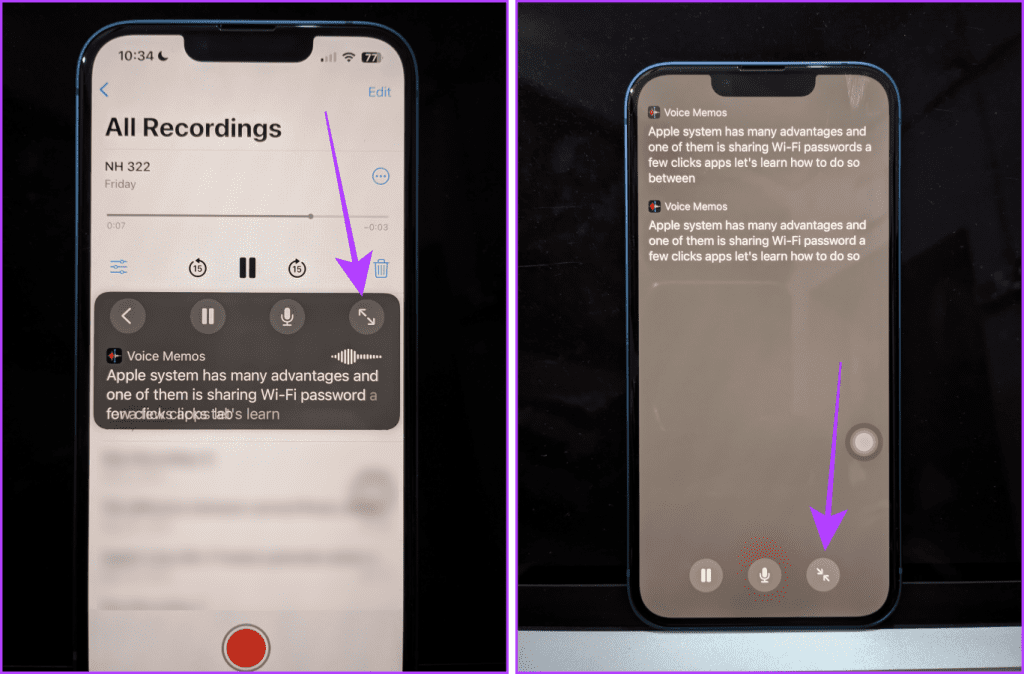
Tap theexpand buttonto view it in full screen.
Note: Apple doesnt allow screenshots or screen recording for the Live Captions.
you might use this method to transcribe a quick voice memo by sending yourself a voice message.
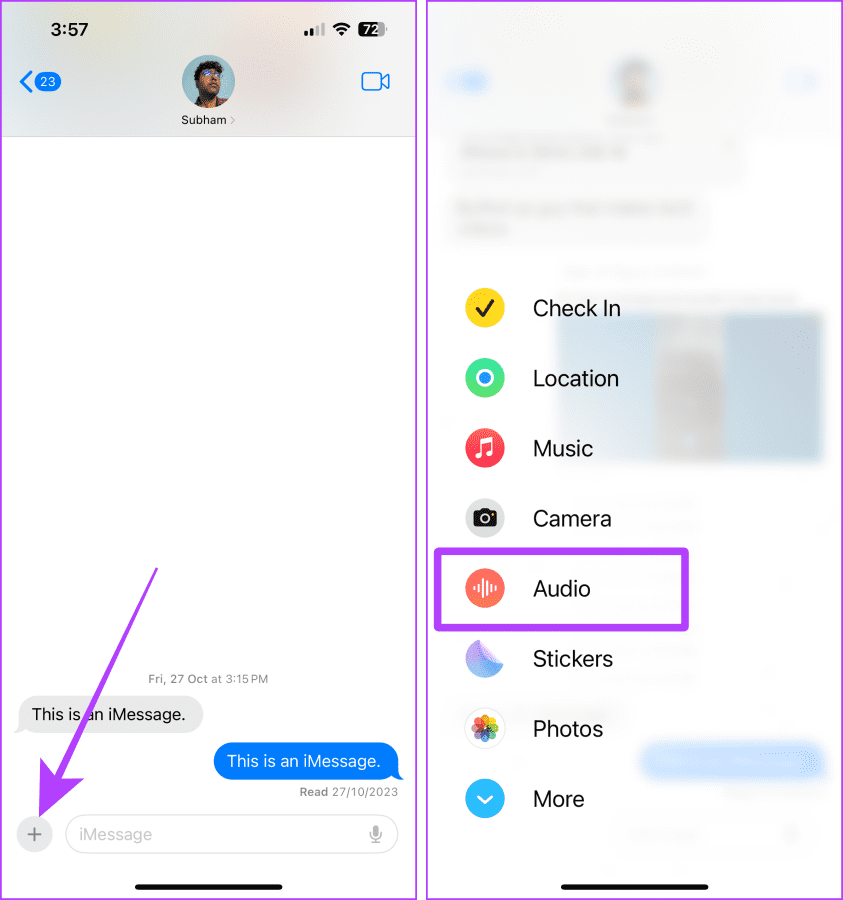
Step 1: Launch theMessages app> search yourname> tap theresult.
Step 2: Tap the+ button> selectAudio.
Tip: If Audio is not showing, swipe up in the list.
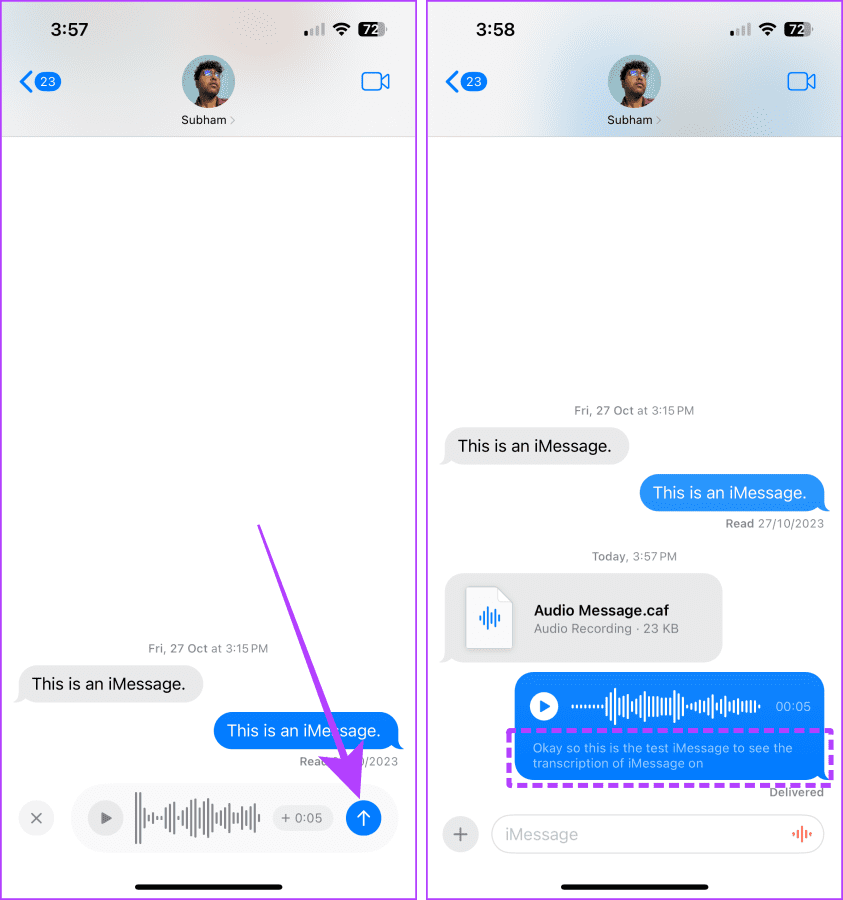
Step 3: The audio will start recording; tap theSend buttonto send the recording.
Now, you will see the transcription of the sent voice memo along with the audio.
Furthermore, you could also save this voice message to the Voice Memo app on your iPhone.
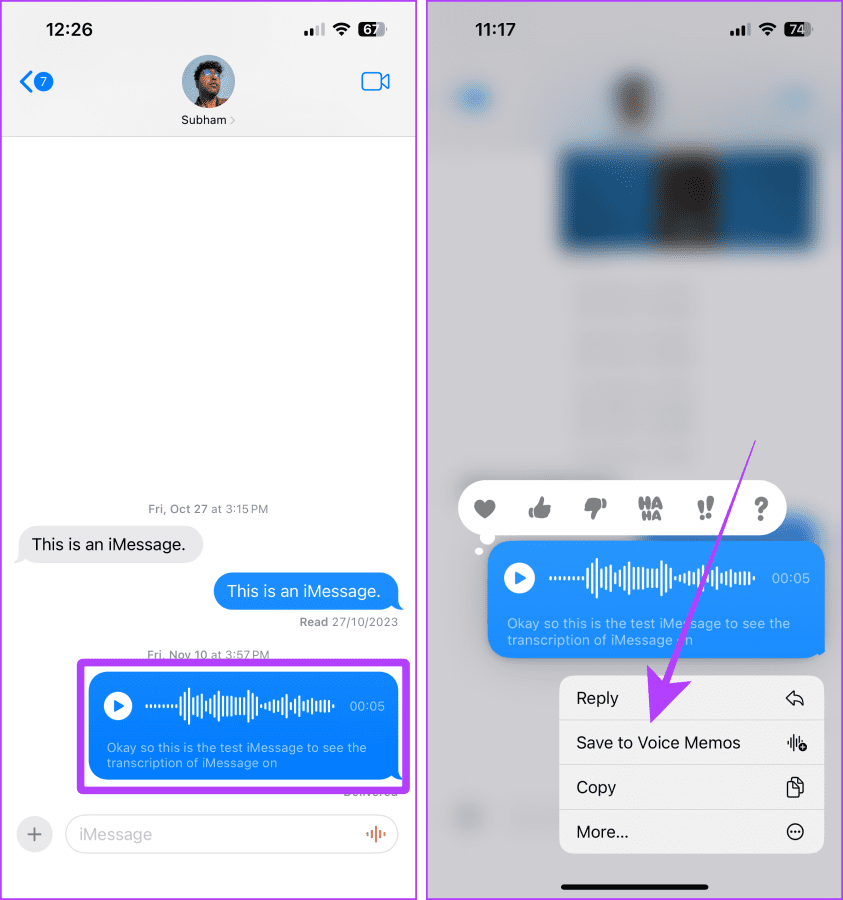
Tap and hold thevoice messageSave to Voice Memos.
Method 3: Use Third-Party Apps to Transcribe Voice Memos
1.
Many apps on the App Store, likeRev, transcribe and record voice memos natively.
Although Rev is free to download, youll need its paid version to use transcription.
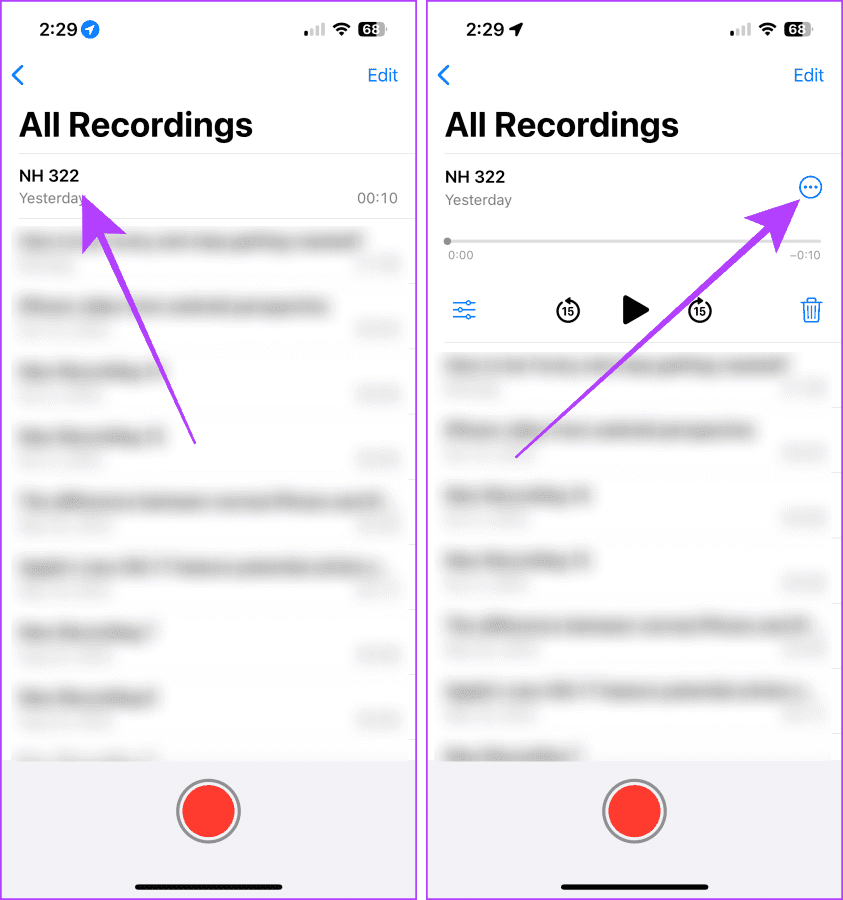
Step 1: Launch theVoice Memo app> tap the recording you want to transcribe.
Step 2: Tap thethree dots icon.
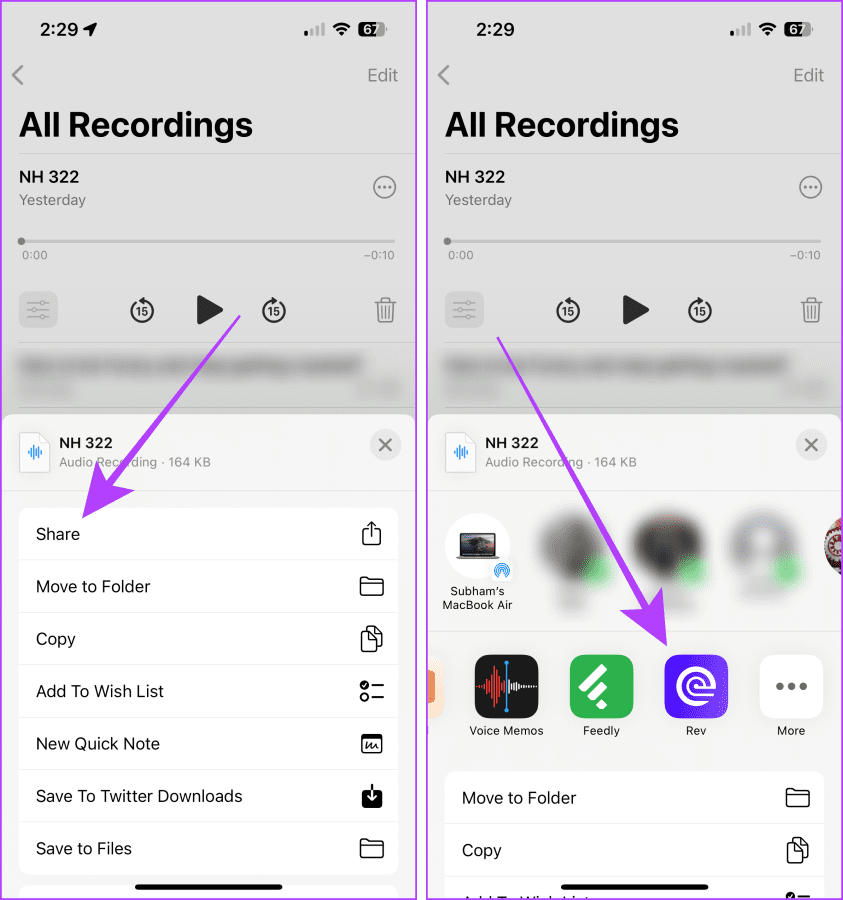
Step 3: Now, tapShare.
Scroll and selectRevfrom the options.
Step 4: In the Rev app, go to theRecordingssection.
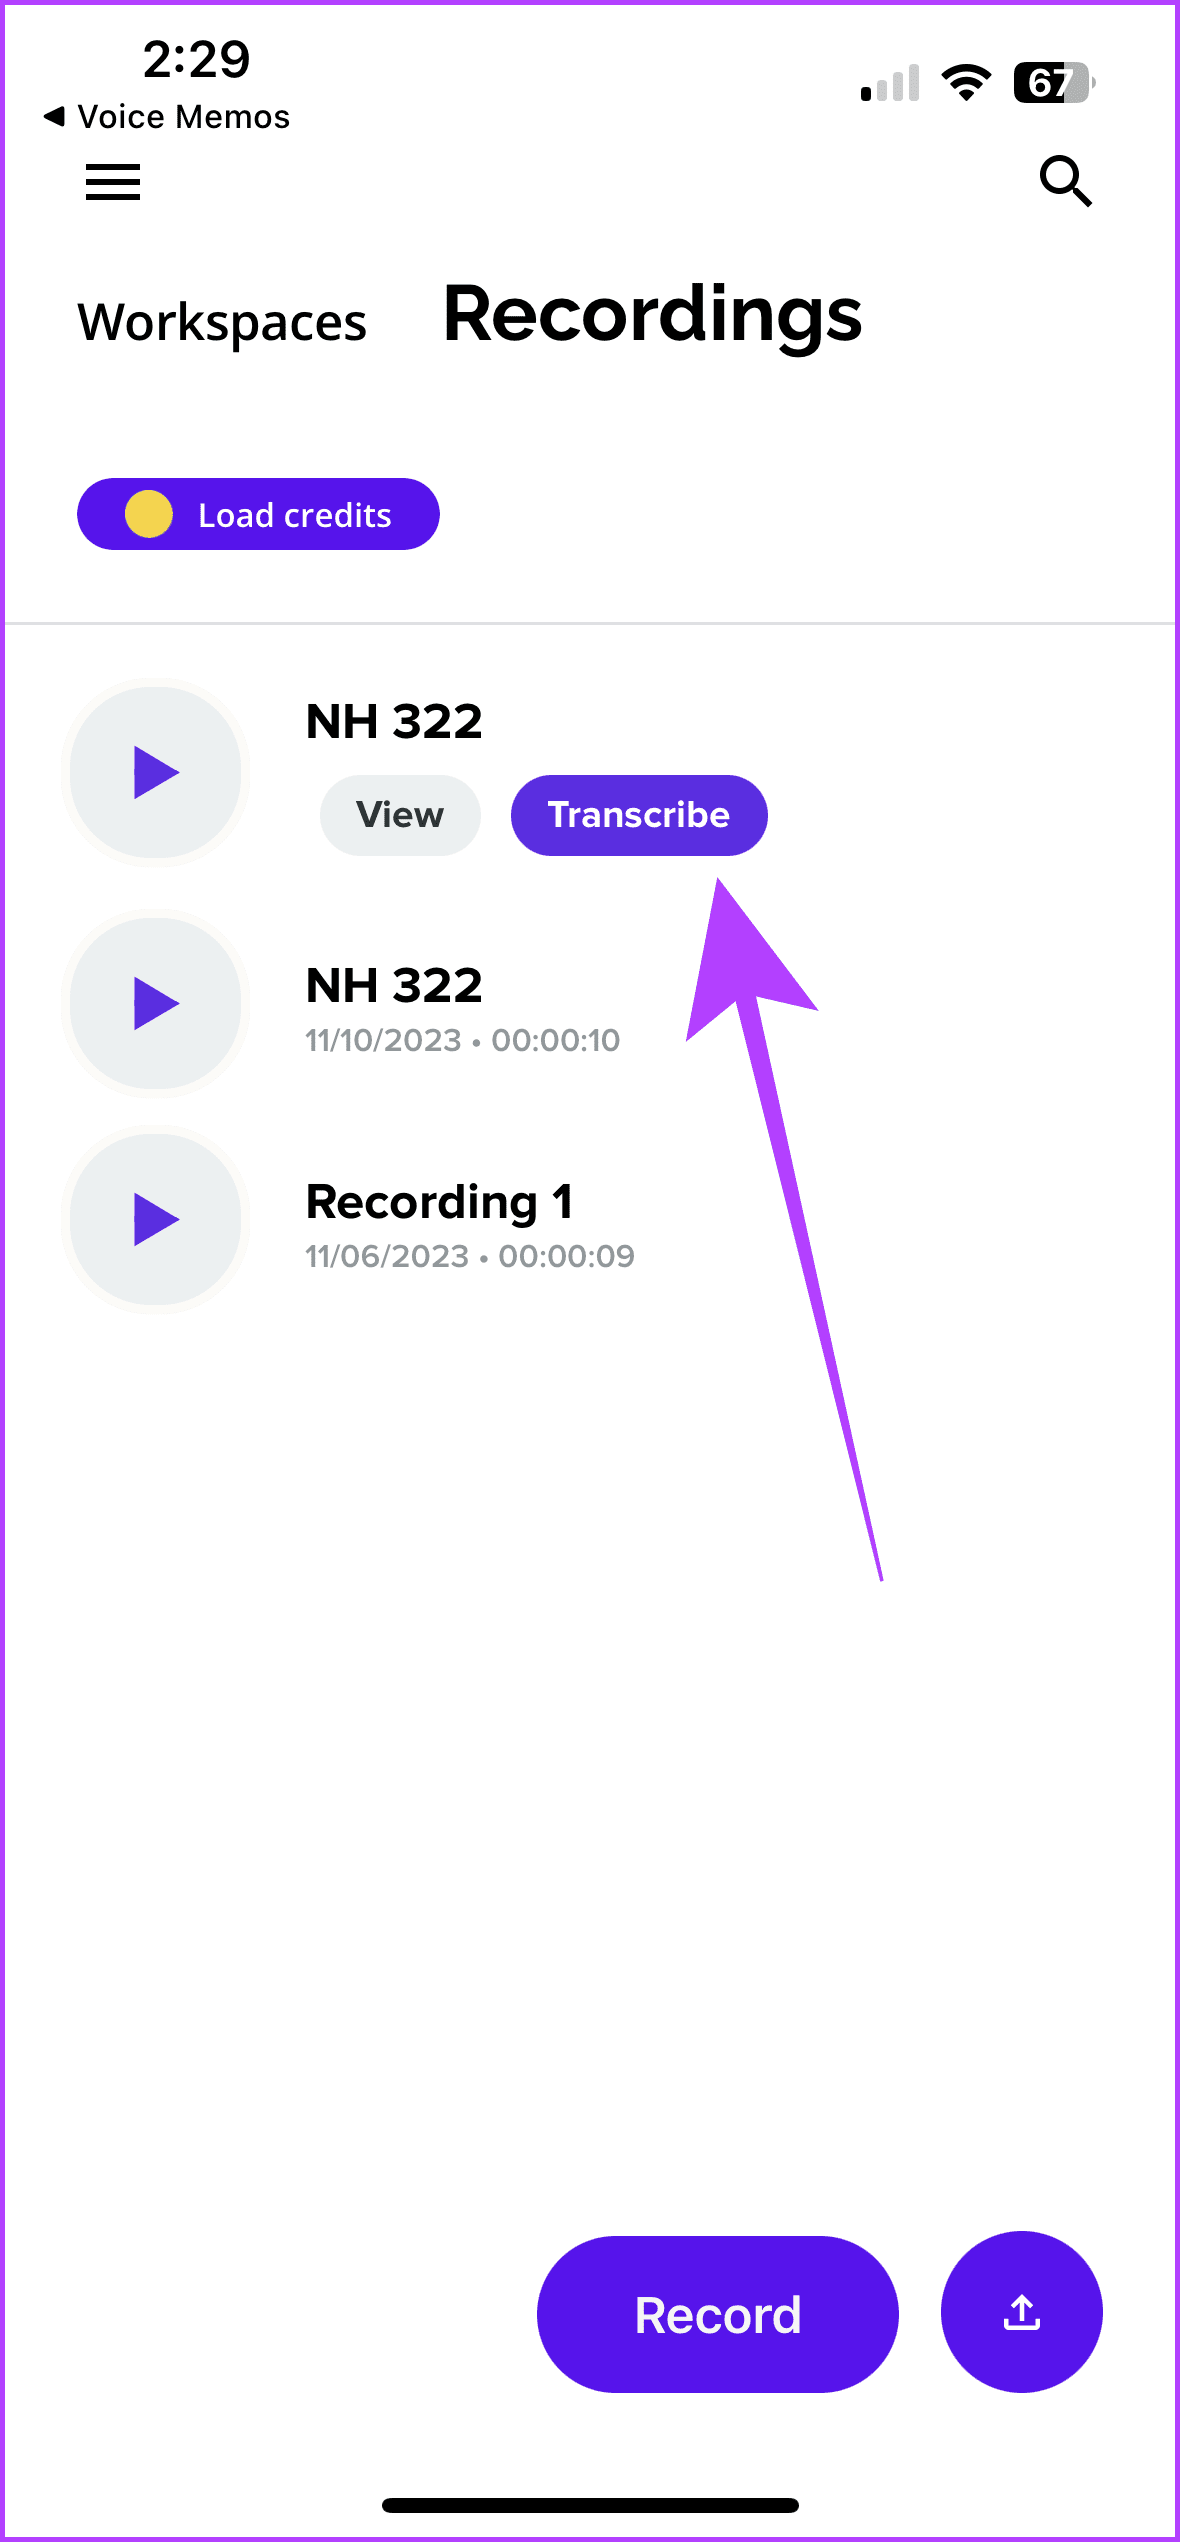
TapTranscribenext to the Voice Memo you imported.
You must have seen YouTube videos with auto-generated transcripts.
Step 2: TapSave to Filesin the share sheet > selectSave.

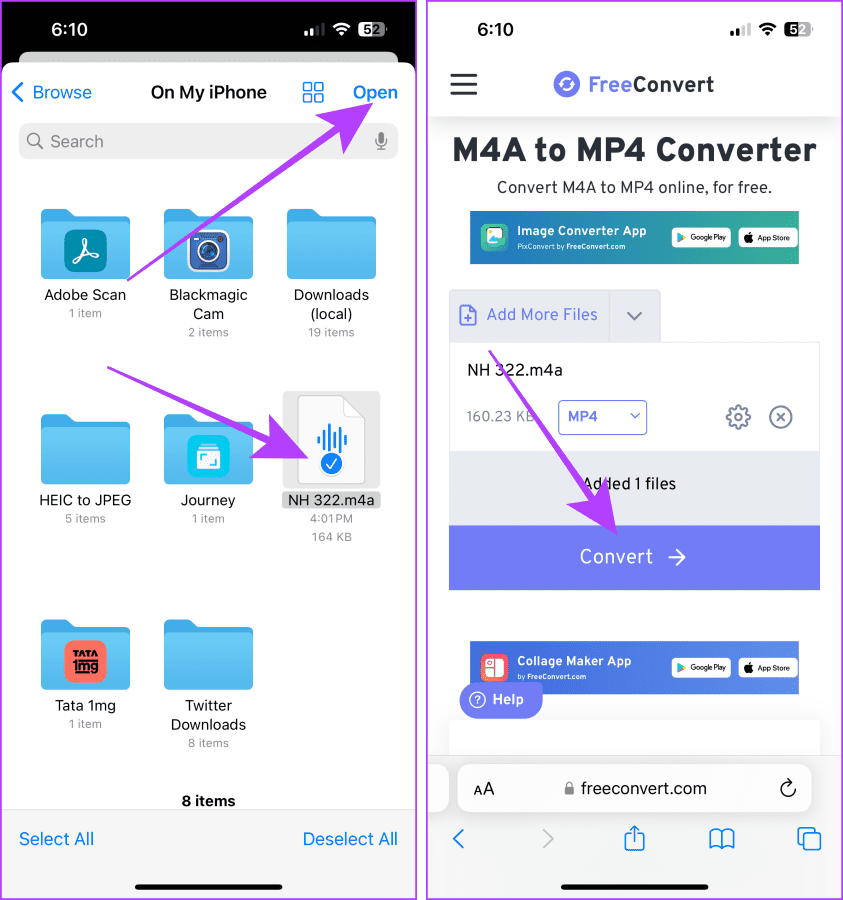
Step 3: Now, go to theFreeConvertor any other website of your choice.
Step 4:Uploadthe saved voice memo.
On the next page, tapConvert.
Step 5: Once the file is converted, tapDownload.
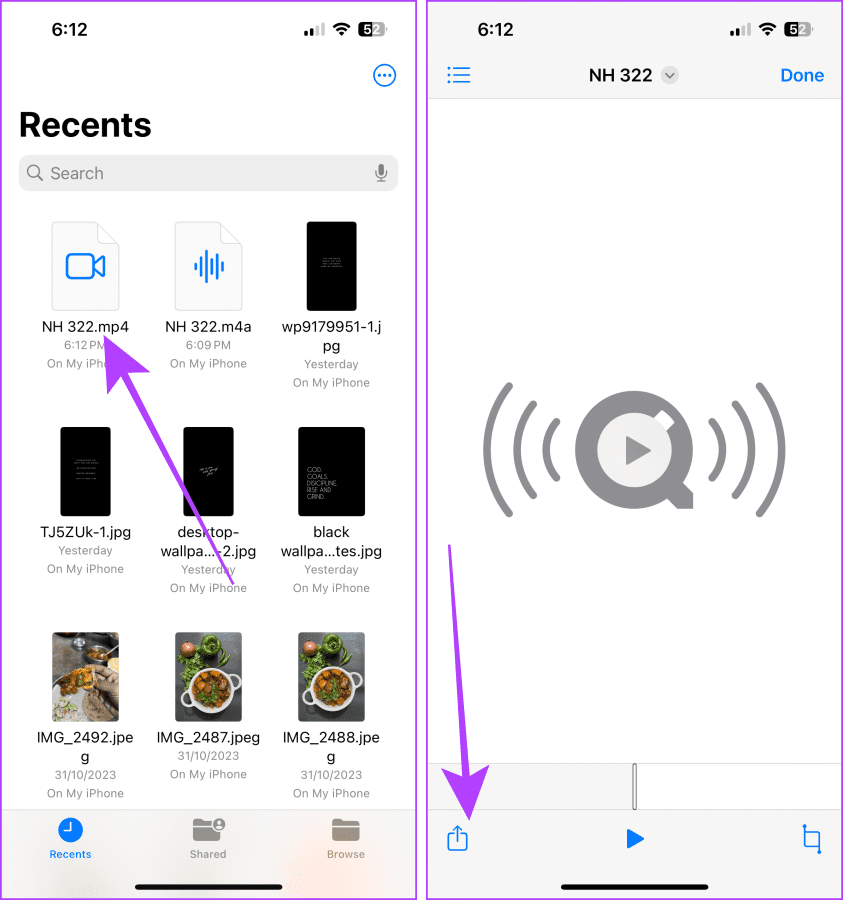
Step 6: Now, go toRecentsin the Files app > open therecently downloaded video.
Step 7: Tap thesharebutton > selectSave Videofrom the options.
Step 8: OpenYouTubeon your iPhone > tap the+ button select thevideo.
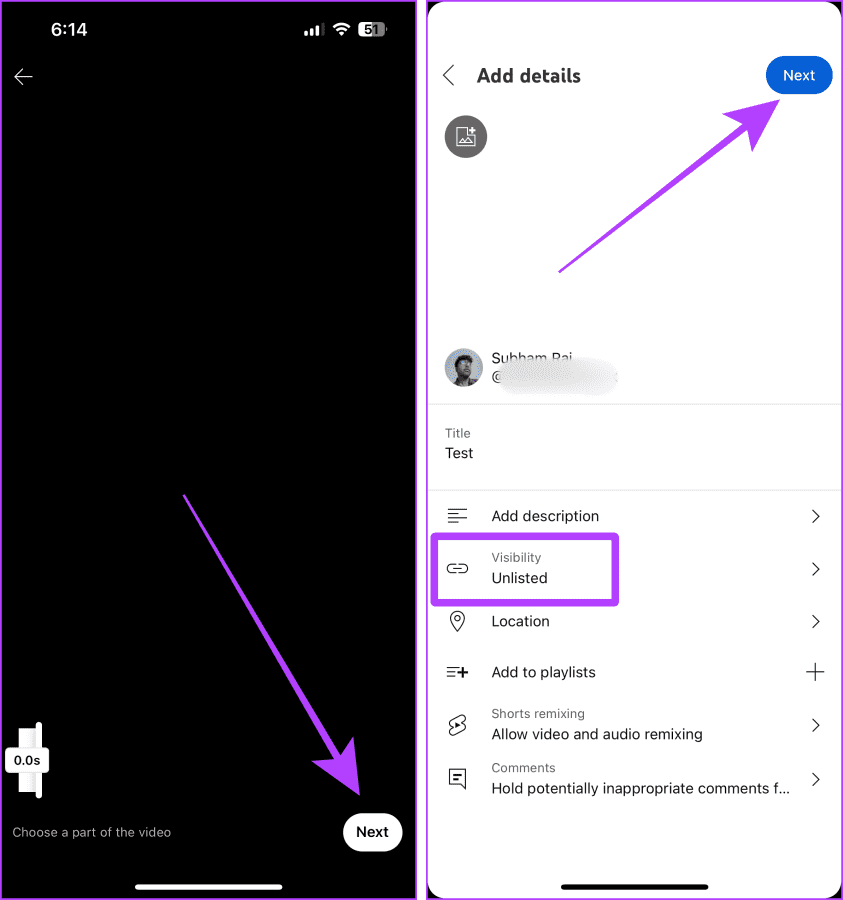
Step 9: Once the video uploads, tapNext.
Step 10:Titlethe video > ensure the Visibility is set toUnlisted> tapNext.
Once your video finishes uploading, go through this to access your uploaded voice memo.
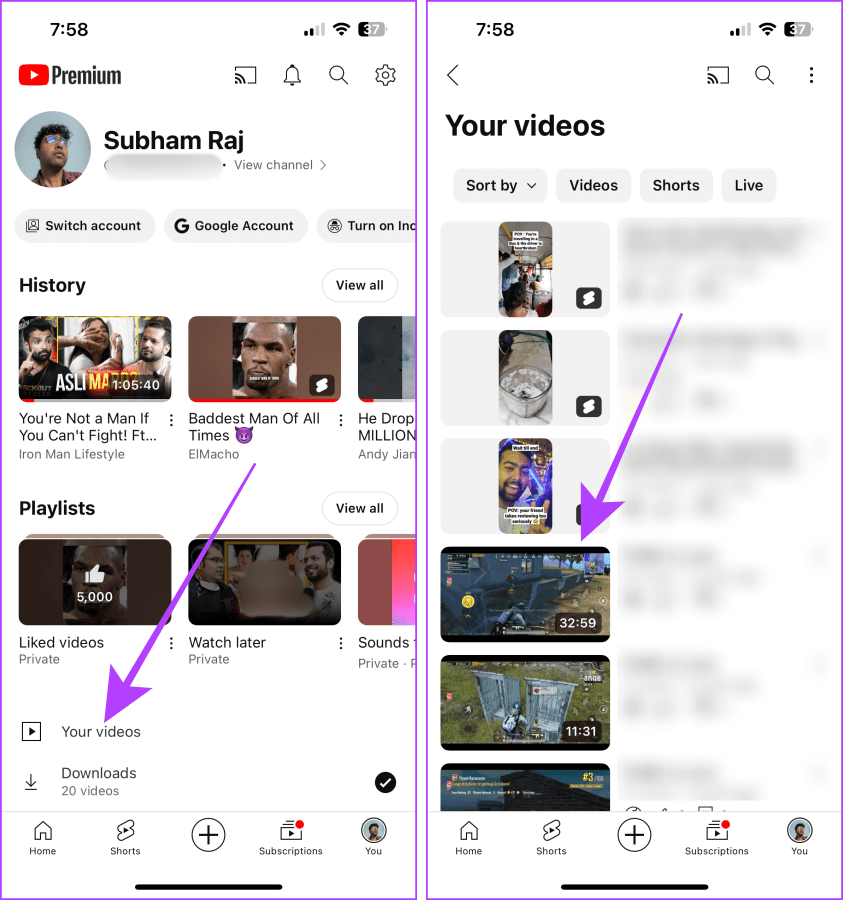
Step 11: Go to theYou tabon YouTube > tapYour videos.
Step 12: Now, tap thevideoto open it on the full screen.
Step 13: Tap the video title to open thedescription.
Scroll up in the description.
Step 14: Here, tapShow transcript.
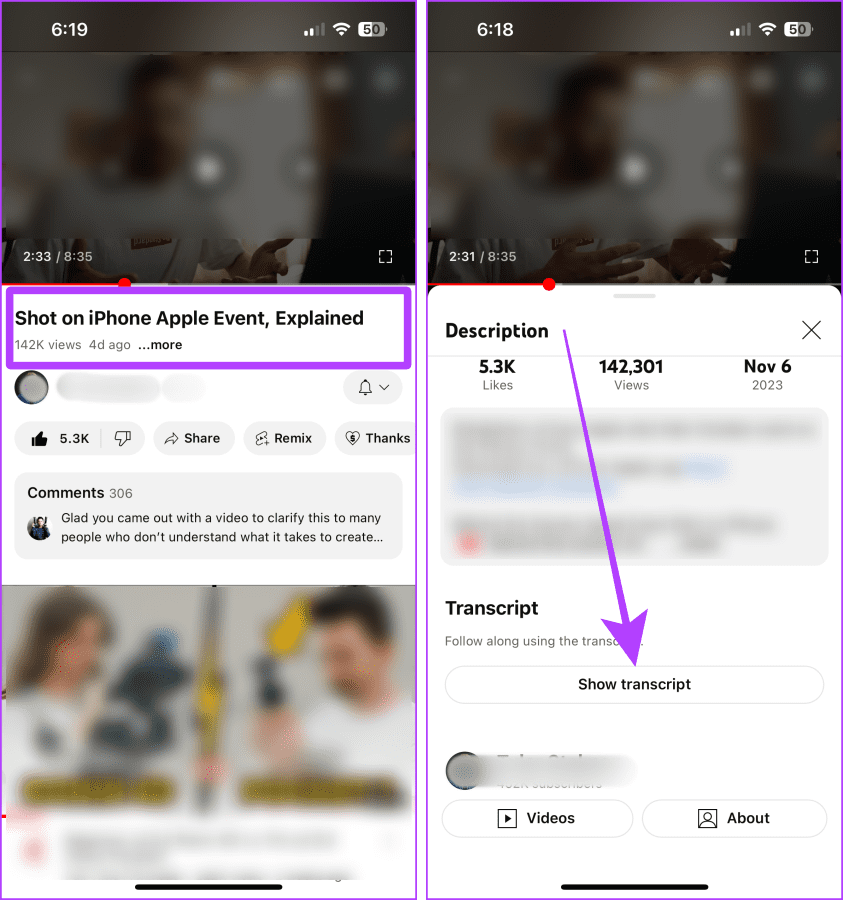
And YouTube will auto-transcribe the voice memo.
The best part is that the transcripts are time-synced, and you could share this video with anyone.
However, consider the extra efforts that go into this method.
Did you know that Microsoft 365 has an in-built transcribe feature?
The process is simple.
Import the voice memo from youriPhone to your Mac or PCand follow the below steps.

Note: Although most of Microsoft 365s features are free to use, the Transcribe feature is paid.
Step 1: OpenMicrosoft 365WordCreate New(or existing document as per preference).
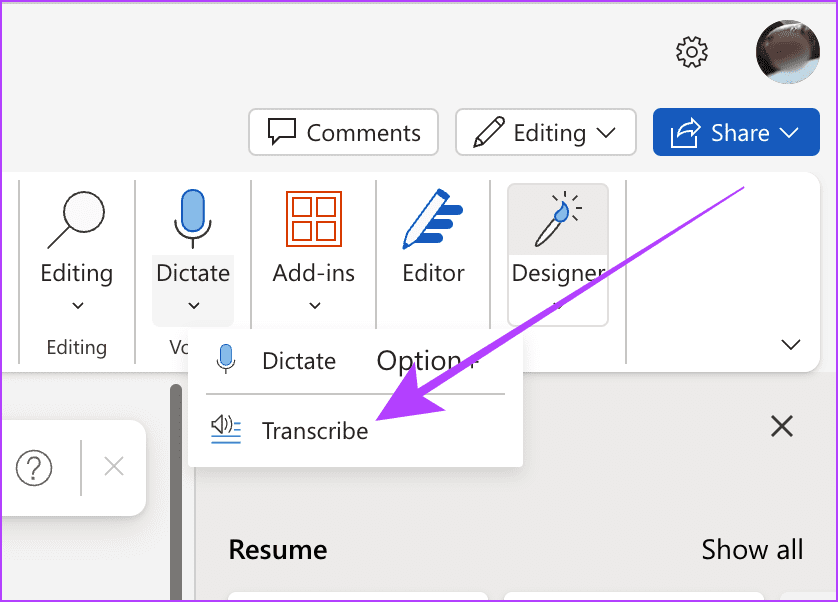
Step 2: Now, go todictatefrom the Word toolbar.

hit the down arrow and selectTranscribe.
Step 3: Click onUpload audioand upload the Voice memo.
Thats it; once the audio is processed, it will be available with the transcripts.

Was this helpful?
The content remains unbiased and authentic and will never affect our editorial integrity.