Remapping keys is only one of several abilities that Microsoft PowerToys offers.
But first, you need toinstall the softwarebefore you might remap keyboard keys.
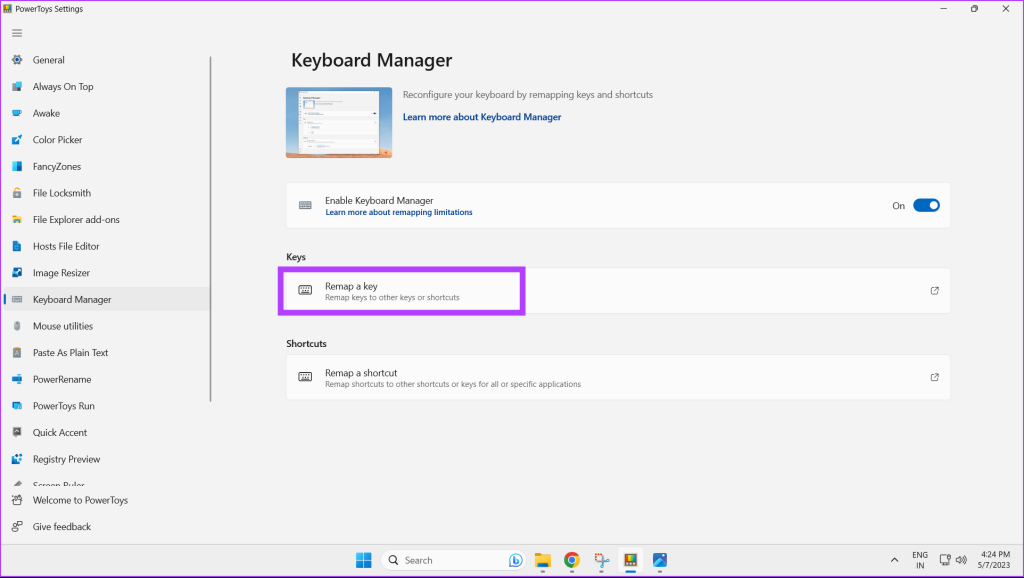
Step 2:Click onKeyboard Managerin the sidebar.

Step 3:Turn on the toggle forEnable Keyboard Manager.
Step 4:Click onRemap a key.
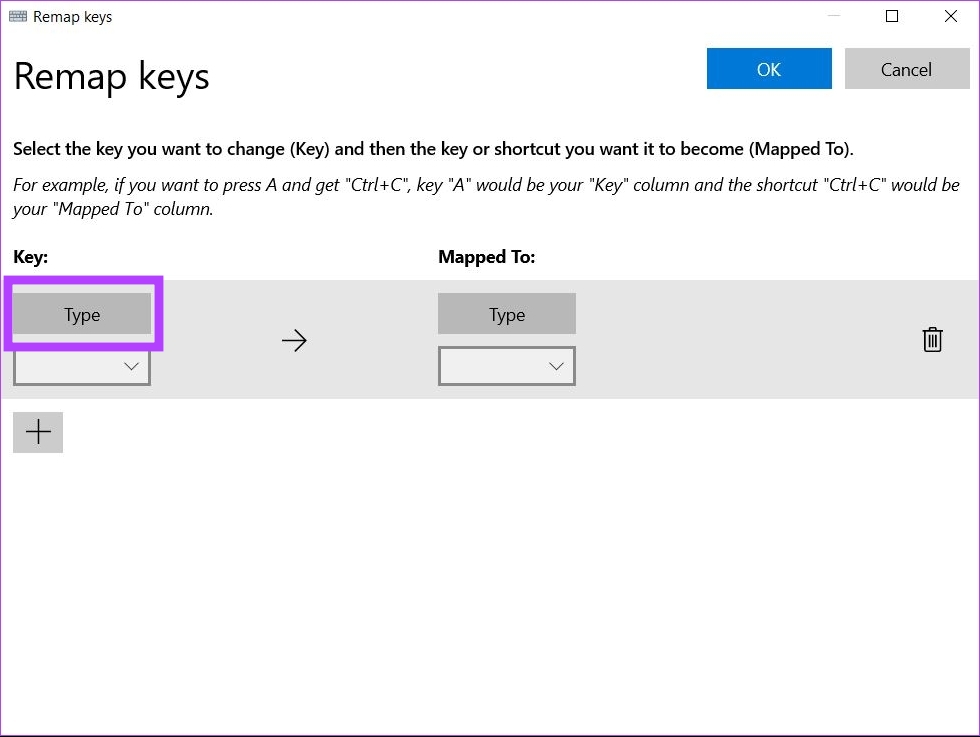
Step 5:In the Remap Keys prompt, choose theplus iconto start remapping your keys.

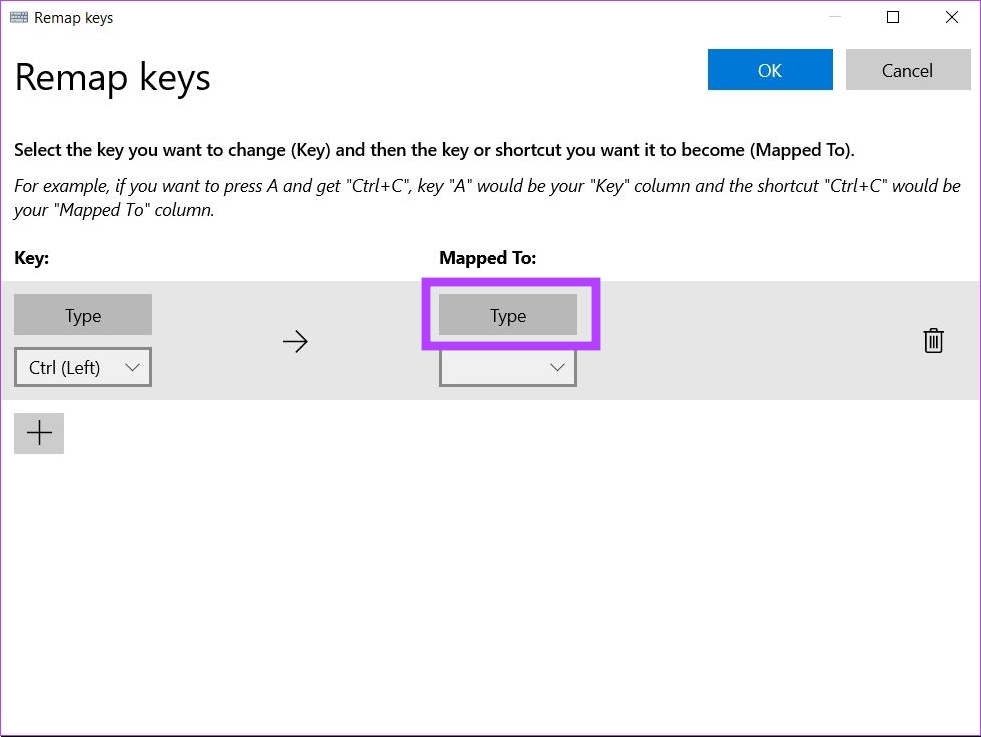
Step 6:hit theTypebutton.
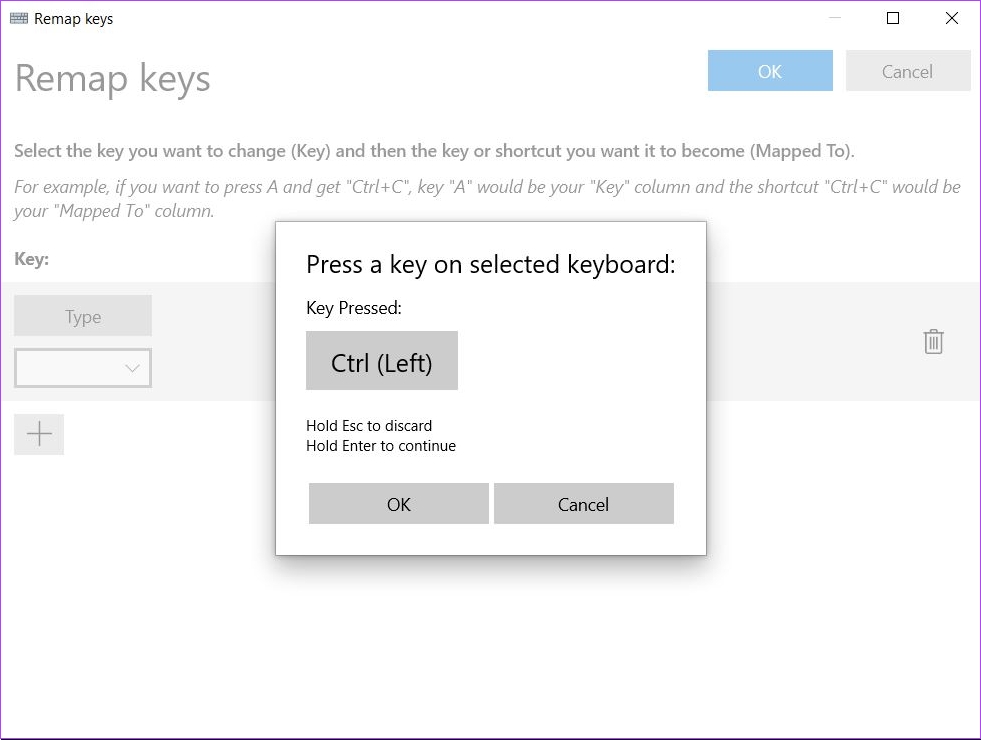
Step 7:Now, press the key on your keyboard that you wish to remap and click onOK.
Step 8:If you want to remap your selected key to a different key, click onType.

Note: Repeat steps 6-9 to remap more keys.
Step 10:Once done, punch theOKbutton at the top right.
Step 11:A warning box will pop up, click onContinue Anyway.
Your selected keys now have been remapped successfully.
Step 2:Click onKeyboard Manager.
Step 3:Now click onRemap a key.
Step 4:To add a new key for remapping, choose theplus icon.
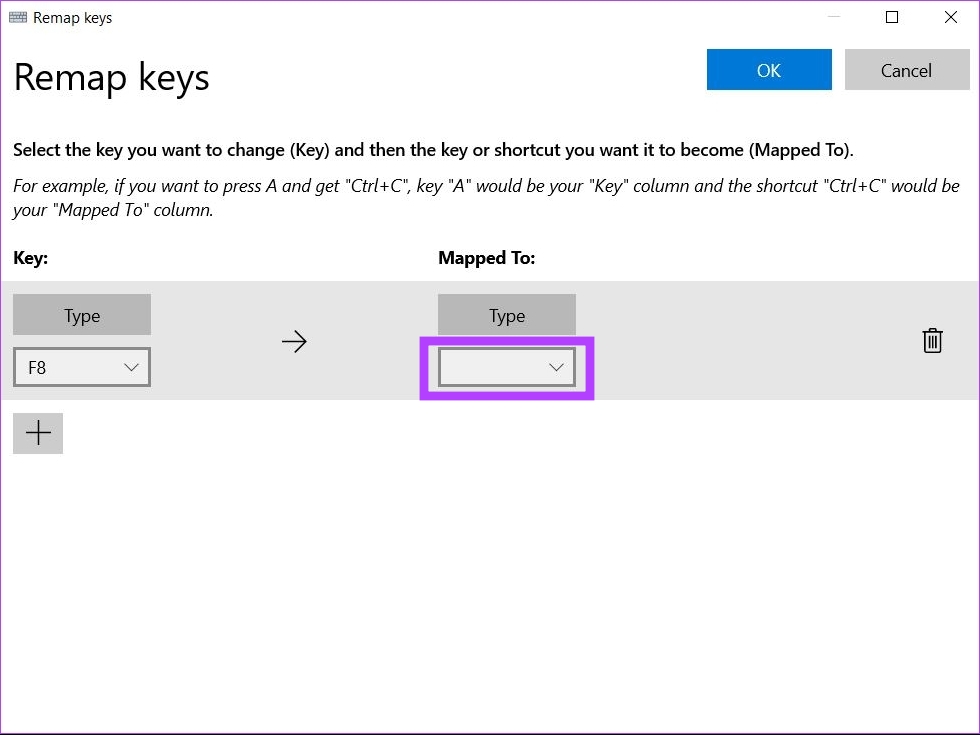
Step 5:Now click onType.
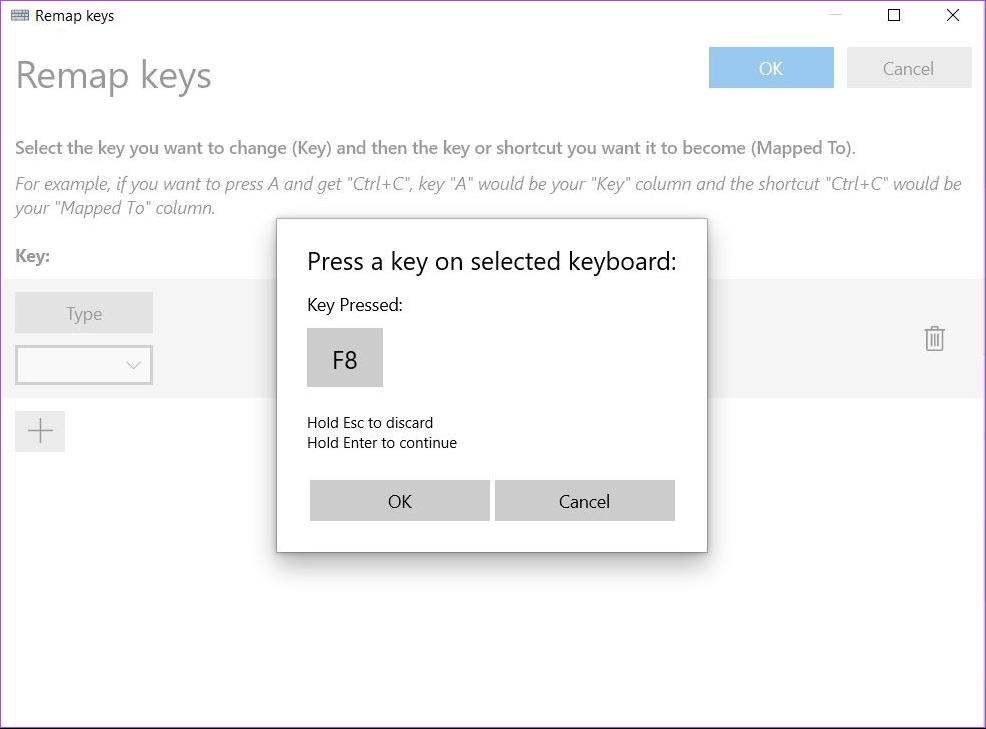
Step 6:Press the key on your keyboard that you wish to remap, and click onOK.
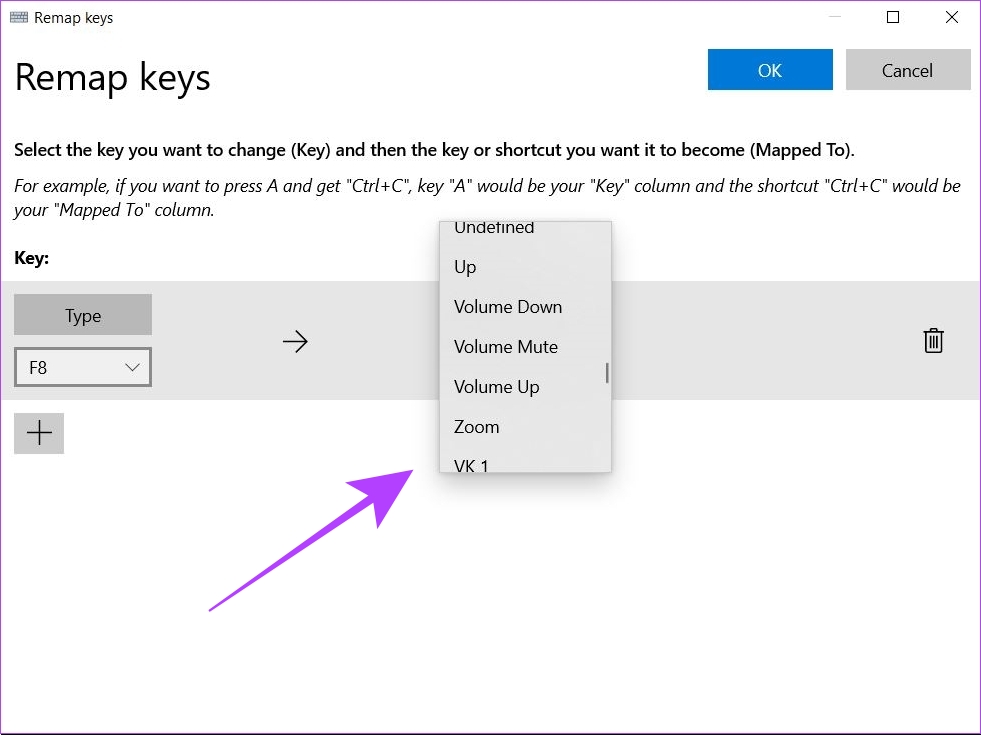
Step 7:To remap your selected to a specific action, tap on the dropdown menu.
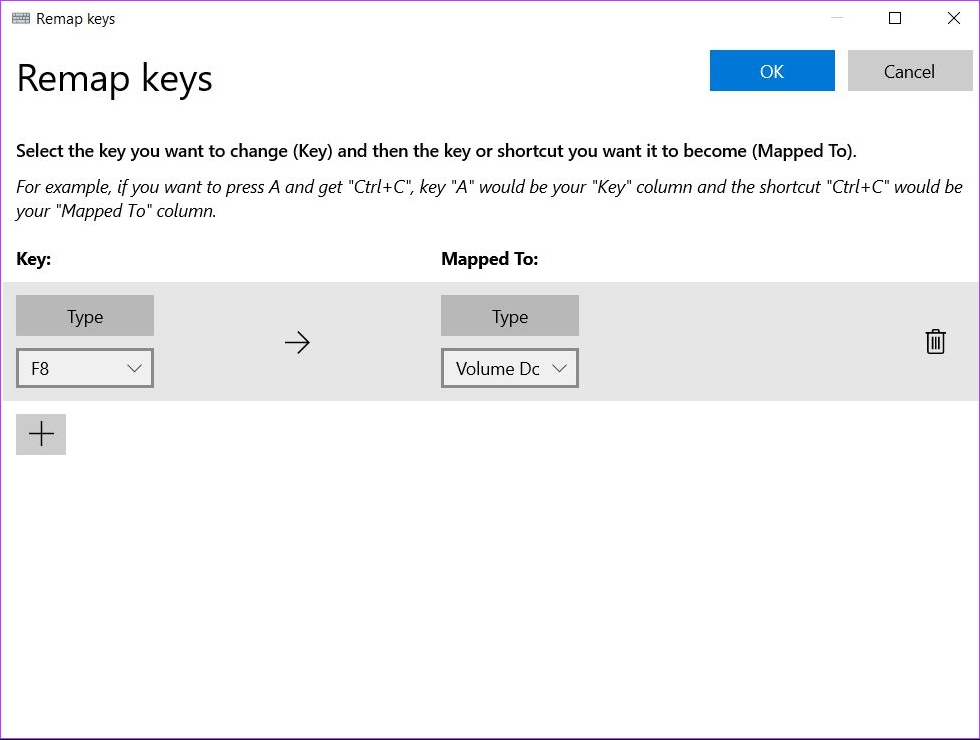
Step 8:opt for action which you want as a remap for your key.
Step 9:go for the blueOKbutton.
Your selected key now has been remapped to perform your desired action.
Remap Shortcuts in Windows 11
As mentioned earlier, you could also remap shortcuts in Windows 11.
Step 3:Now choose Remap a shortcut.
Step 4:To change keyboard shortcuts, select theplus icon.
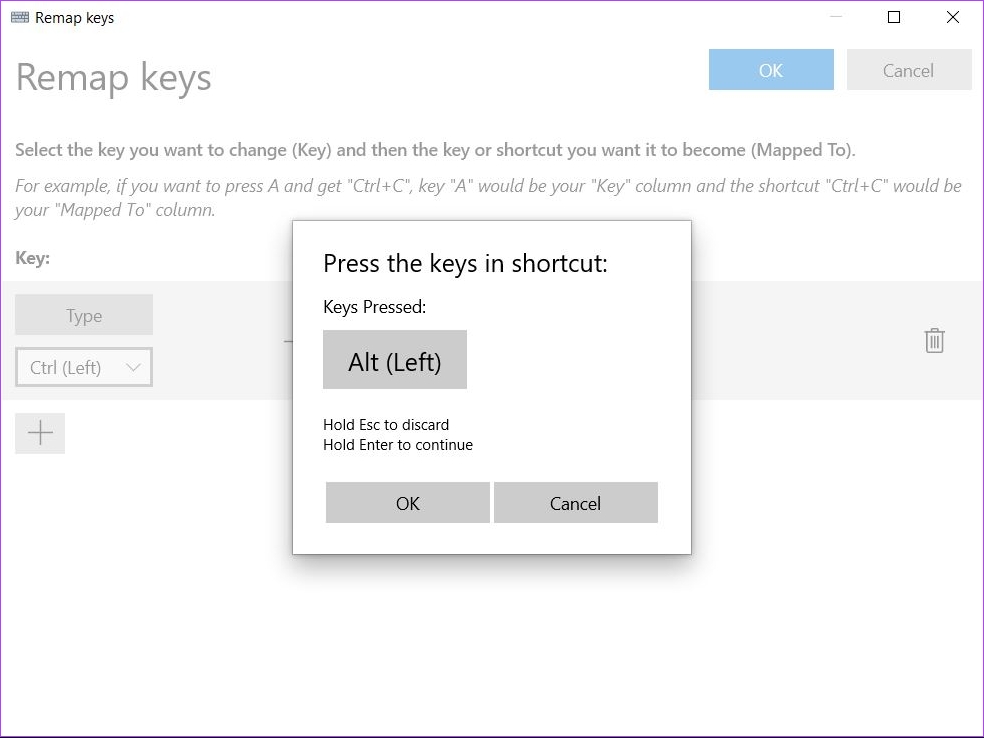
Step 5:press theTypebutton in the Physical Shortcut section.
Step 6:Now press the keys involved in the shortcut which you wish to remap and click onOK.
Note:A maximum of three keys can be remapped.
If your shortcut requires pressing more than three keys, it cannot be remapped using Microsoft PowerToys.
Step 7:punch theTypebutton under theMapped Tosection.

Step 8:Now, press the key you want as a remapped action.
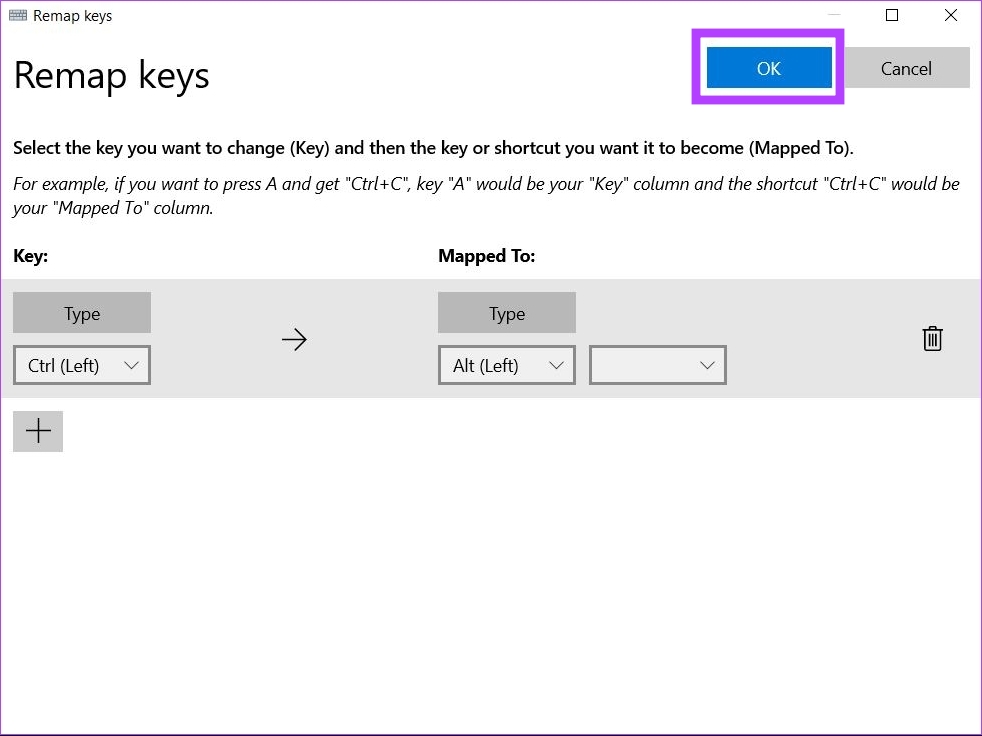
Step 9:tap on theOKbutton to keep your changes.
Your selected shortcut has now been remapped to a new action.

Heres how you’ve got the option to use it.
Note that SharpKeys only supports key remapping and does not support changing keyboard shortcuts.
Step 1:Download SharpKeys from the Microsoft App Store and install it.
Step 2:Open SharpKeys on your Windows 11 machine.
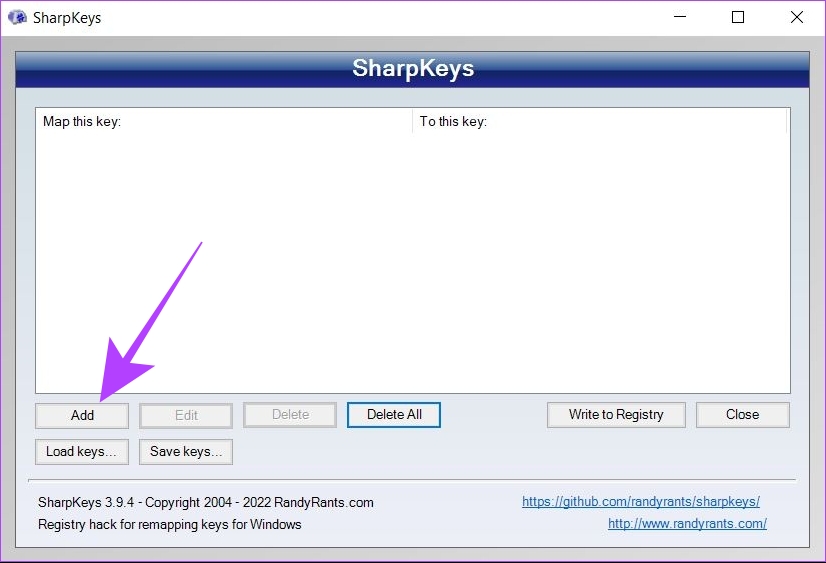
Step 3:To start remapping a key, click onAdd.
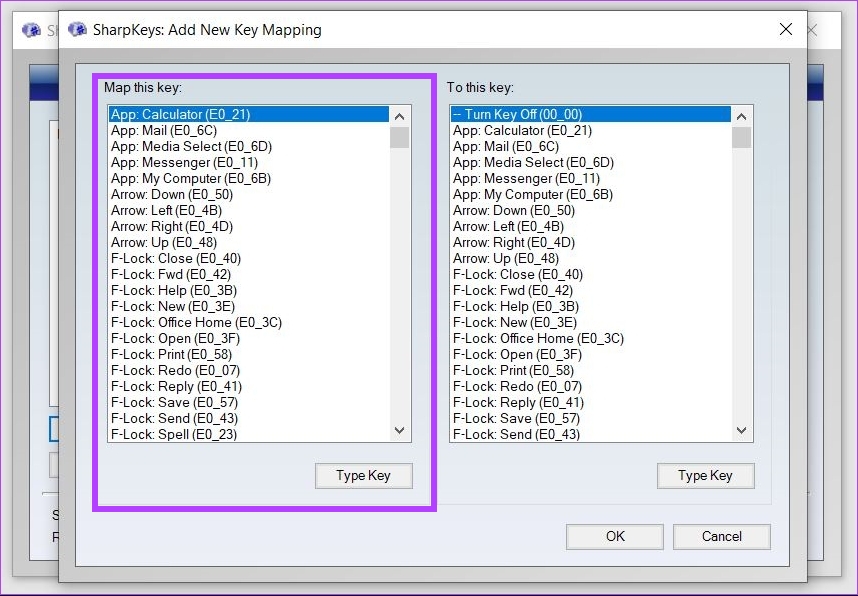
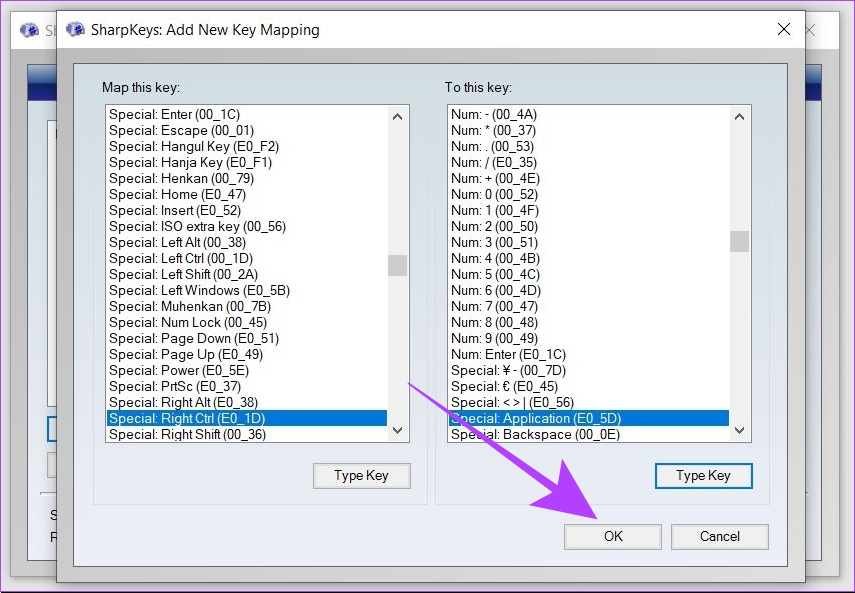
Step 4:pick the key you want to remap from the left list.
Step 5:snag the key you want as a remapped key from the right list.
you might also clickType Keyand press the key directly on your keyboard.
Step 6:Click onOK.
Step 7:Now, click onWrite to Registry.
To apply your changes, reboot your system.
Your keys have now been remapped successfully using SharpKeys in Windows 11.
SharpKeys is as good as Microsoft PowerToys, but applying new changes requires a reboot every time.
Here are the steps to use it.
Step 1:Visit the official SKLC page and hit the download button.

Extract the file, double-snag the downloaded file, and follow the wizard to complete the installation.
Step 2:Launch the app.
Step 4:hit the key you wish to remap on the visual keyboard.

Step 5:Enter the new function and click theOKbutton.
Step 6:Repeat step 5 for as many keys as you like to remap.
Step 7:Click theProjectmenu, thenValidate layout.

Step 8:ClickProject,thenTest Keyboard Layout.
Step 9:ClickProject, thenBuild DLL and Setup Package; choose a saving location and clickOK.
Step 11:Open your controls app.

You may useWindows+Ito open it.
Step 12:NavigateTime & language>Language & region.
Step 13:grab the three dots for your preferred language and clickLanguage options.

Step 14:ClickAdd keyboard, and add your new keyboard.
You may now pressWindows+Spaceto switch to your custom keyboard.
Was this helpful?

The content remains unbiased and authentic and will never affect our editorial integrity.


![]()