Method 1.
Snipping Tool
The Snipping Tool is the native Windows 11 tool that lets you capture screens and record video.
Note:This feature is currently limited to Windows 11.

Step 1:In the taskbar, click theStarticon.
Search for theSnipping Tooland selectOpen.
Step 2:Click thevideo recordingicon and press theNewbutton.
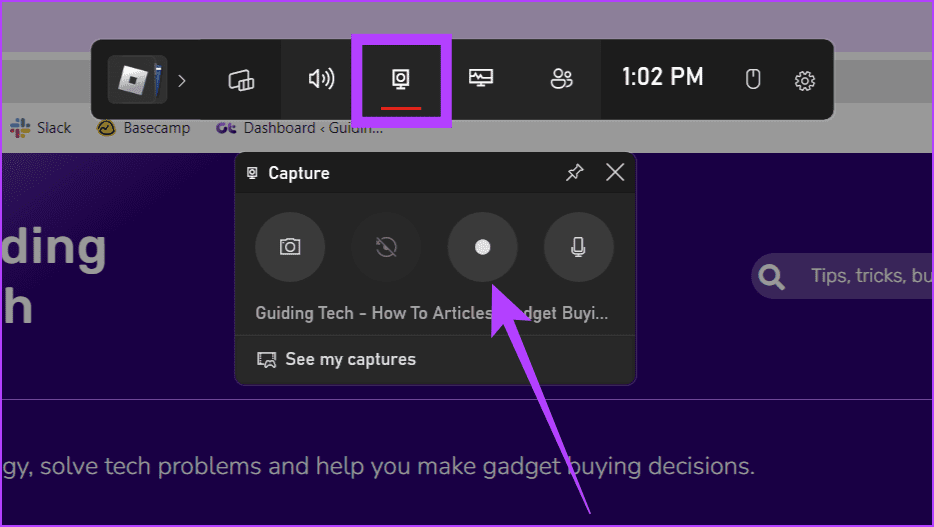
Alternatively, press theWindows + Shift + Rkey to head directly to the Snipping Tool video recording tool.
Step 3: Use your mouse to grab the area you want to record.
Click themicrophone iconin the tool to enable it and pressStartto initiate recording.
Tip:If the mic icon is grayed out, head toSettings>Privacy & security>Microphone.
fire up the microphone and ensure the button next to the Snipping Tool is toggled on.
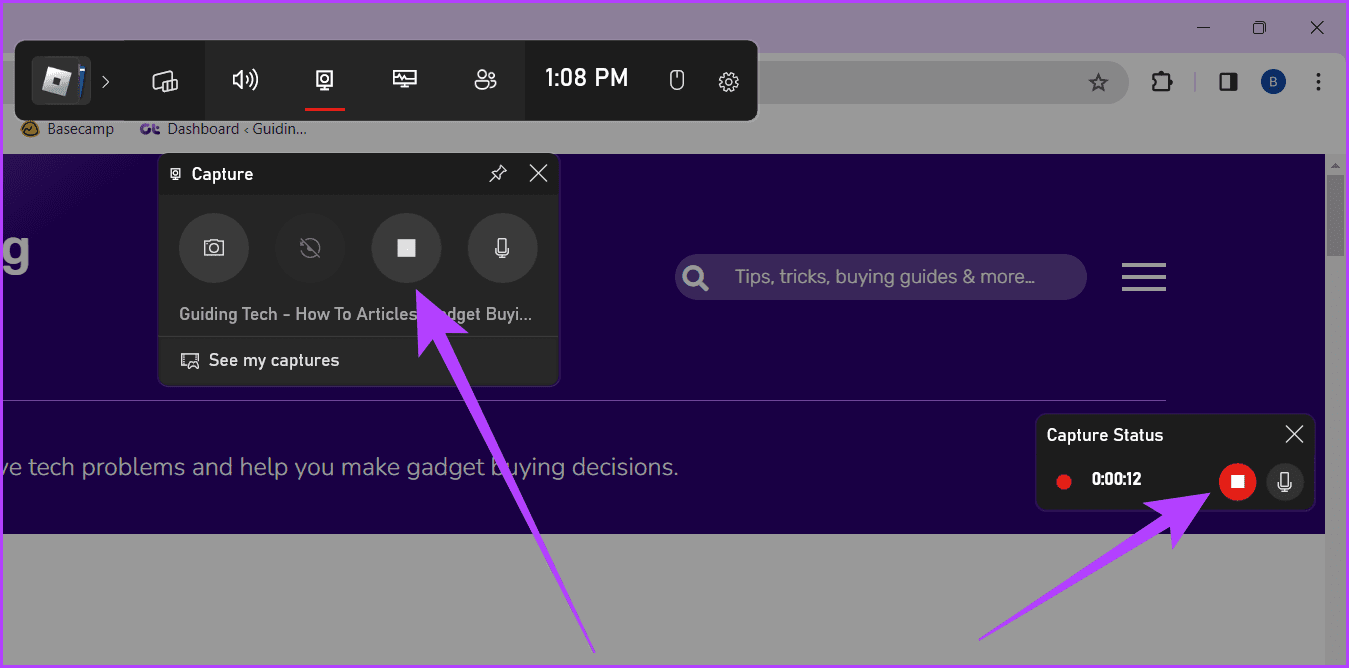
Youll see a 3-second countdown, and the screen recording will start.

Step 4:Once the recording is complete, press theStopicon.
Step 5:Finally, youll see the video.
Method 2.
Xbox Game Bar
Note:You cant record your desktop or File Explorer with the Xbox Game Bar.
Check our explainer torecord your screen without relying on the Xbox Game Bar.
Method 3.
Utilizing Third-Party Screen Recording Software
Step 1:Download and install OBS Studio from theofficial site.
Step 2:PressWindows + S, typeOBS Studio, and launch it.
Step 3:If you are installing OBS Studio for the first time, follow the steps below.
If you have installed it before, skip them.
a.Under Usage information, selectOptimize just for recording, I will not be streamingand clickNext.
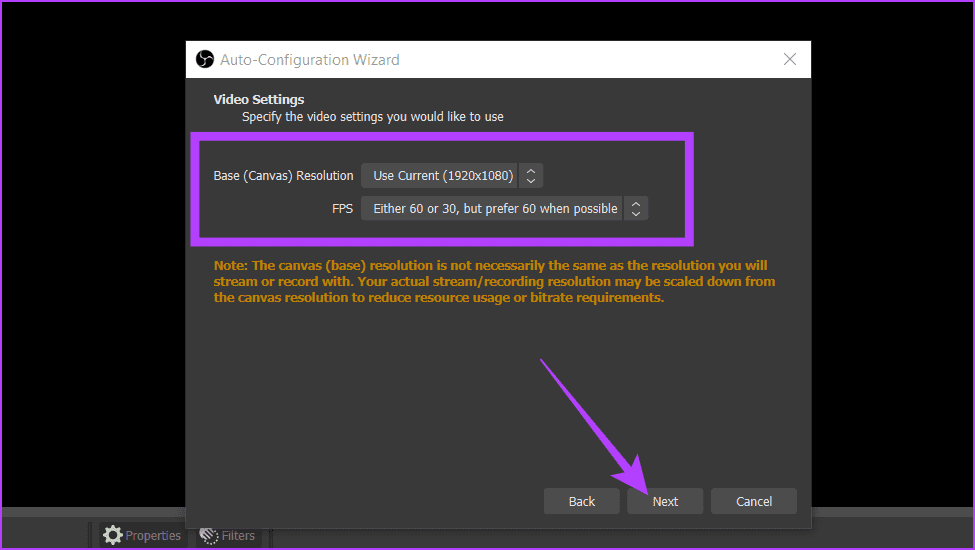
b.For Video parameters, adjust the Base (Canvas) Resolution and FPS and pressNext.
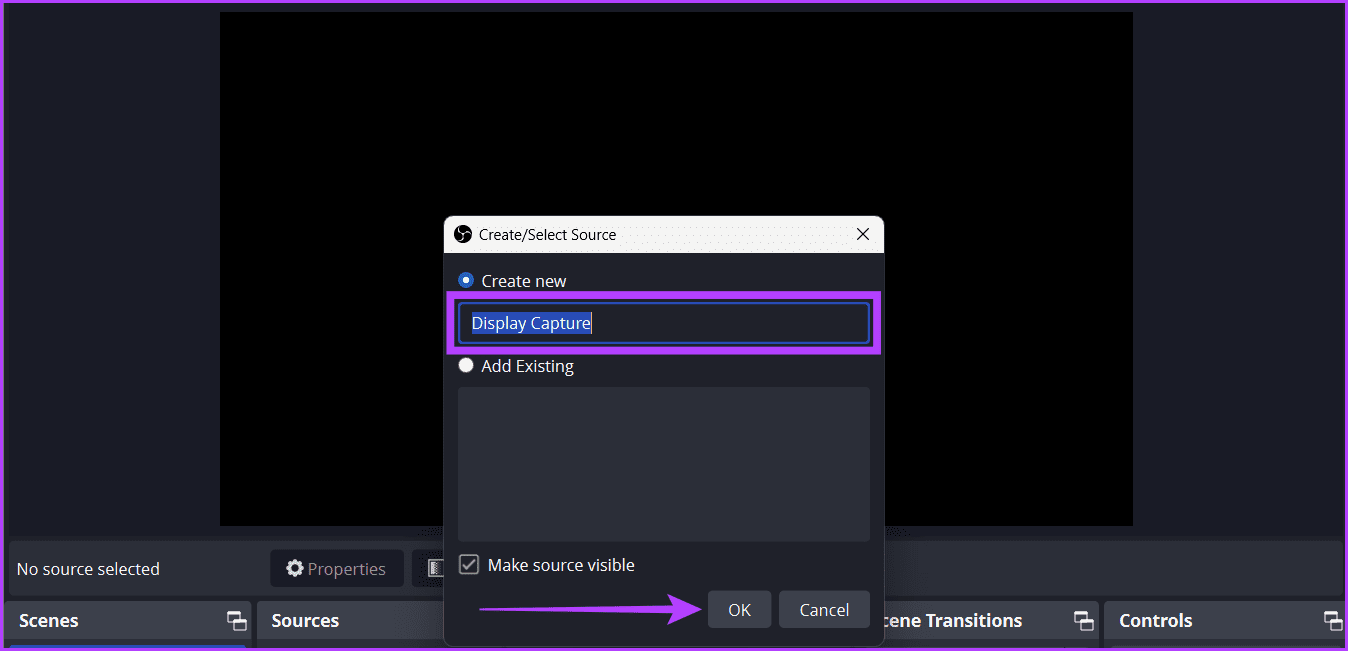
Step 4:hit the+icon under the Sources box and chooseDisplay Capture.
Step 5:Rename the Capture and pressOK.
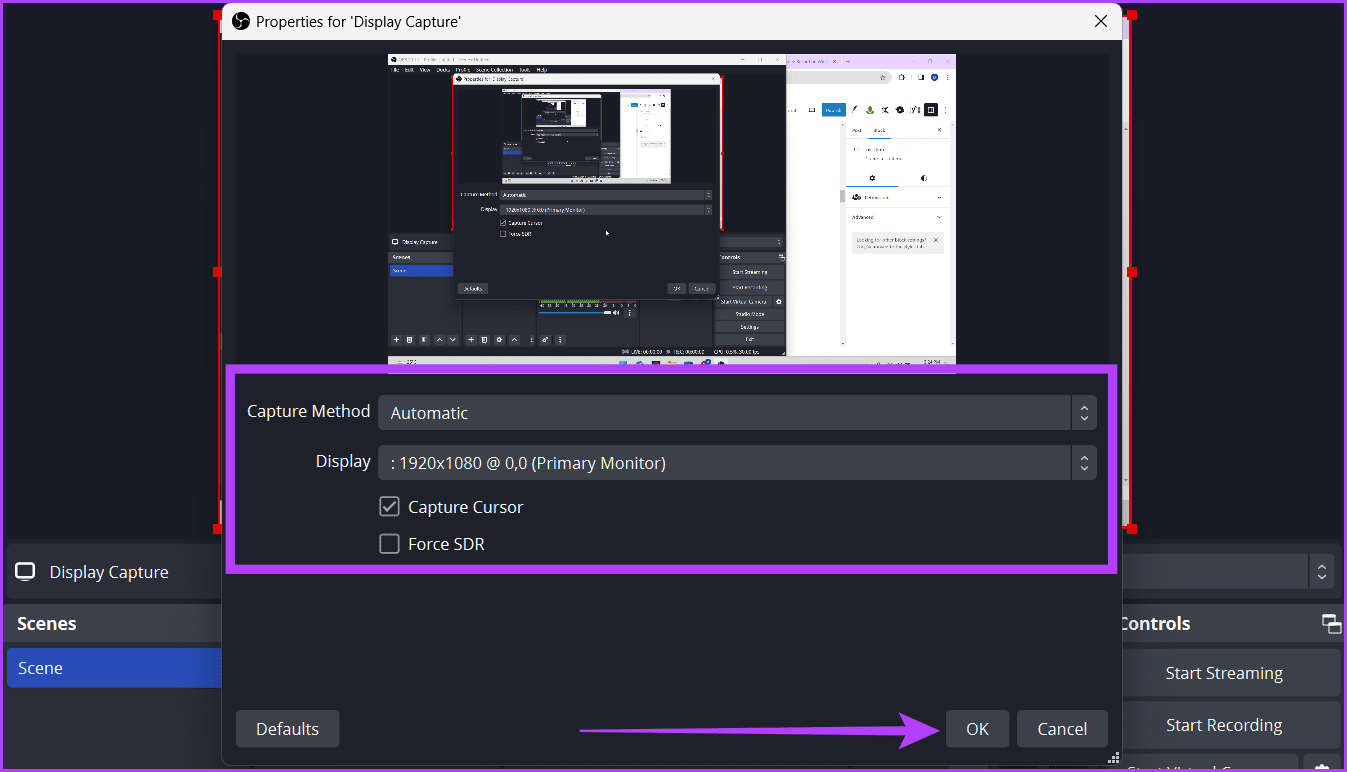
Step 6:Adjust the below-mentioned tweaks and clickOK.
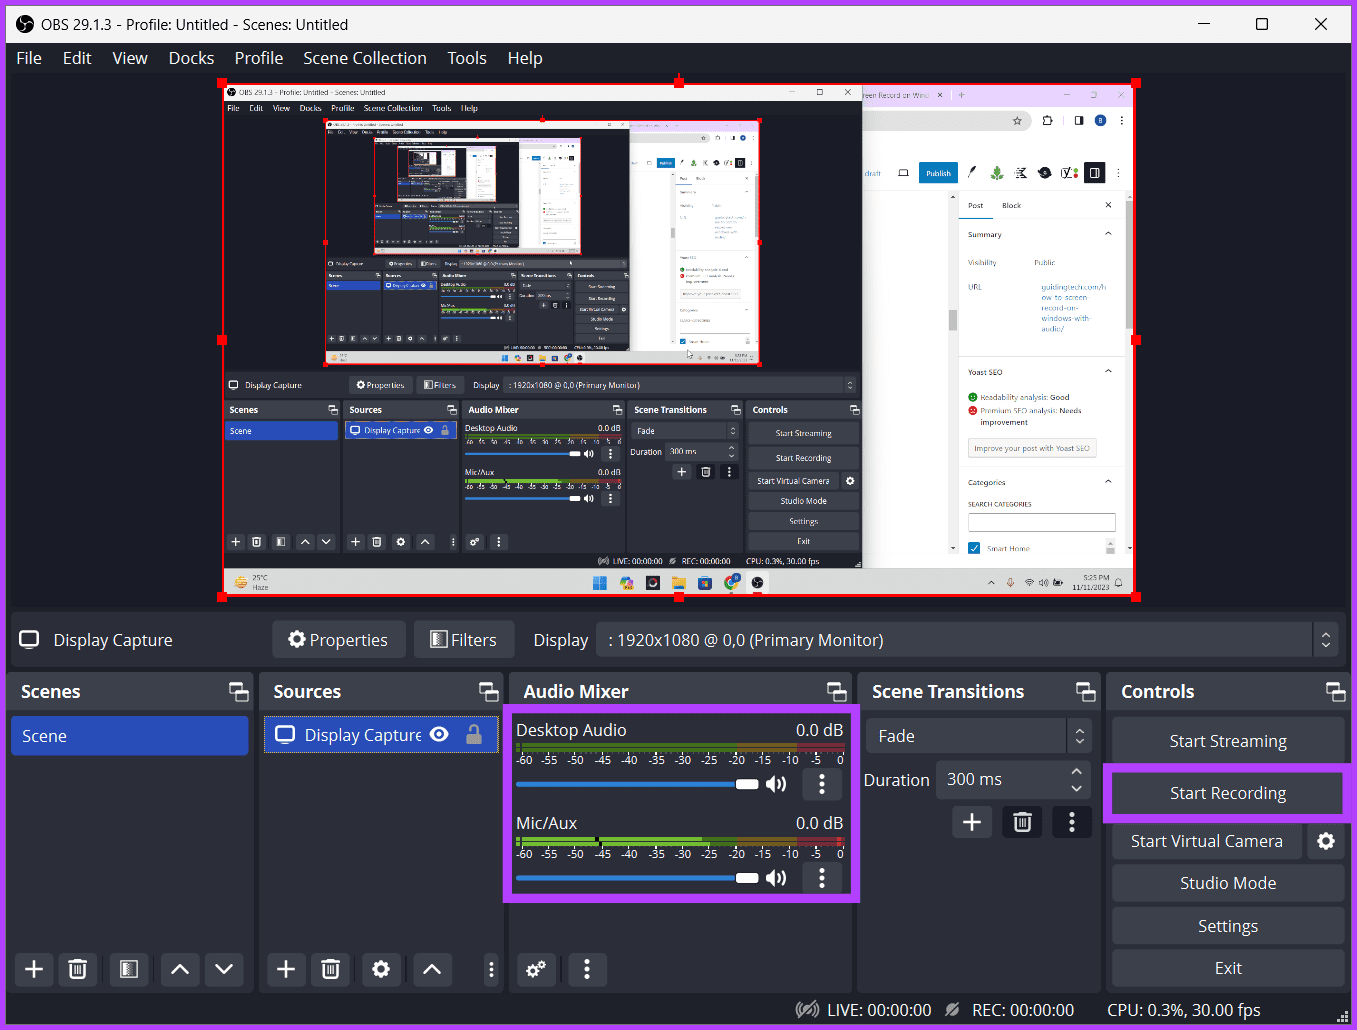
Step 7:Adjust the Desktop Audio and Mic/AUX sliders.
Finally, clickStart Recordingand minimize the OBS Studio window.
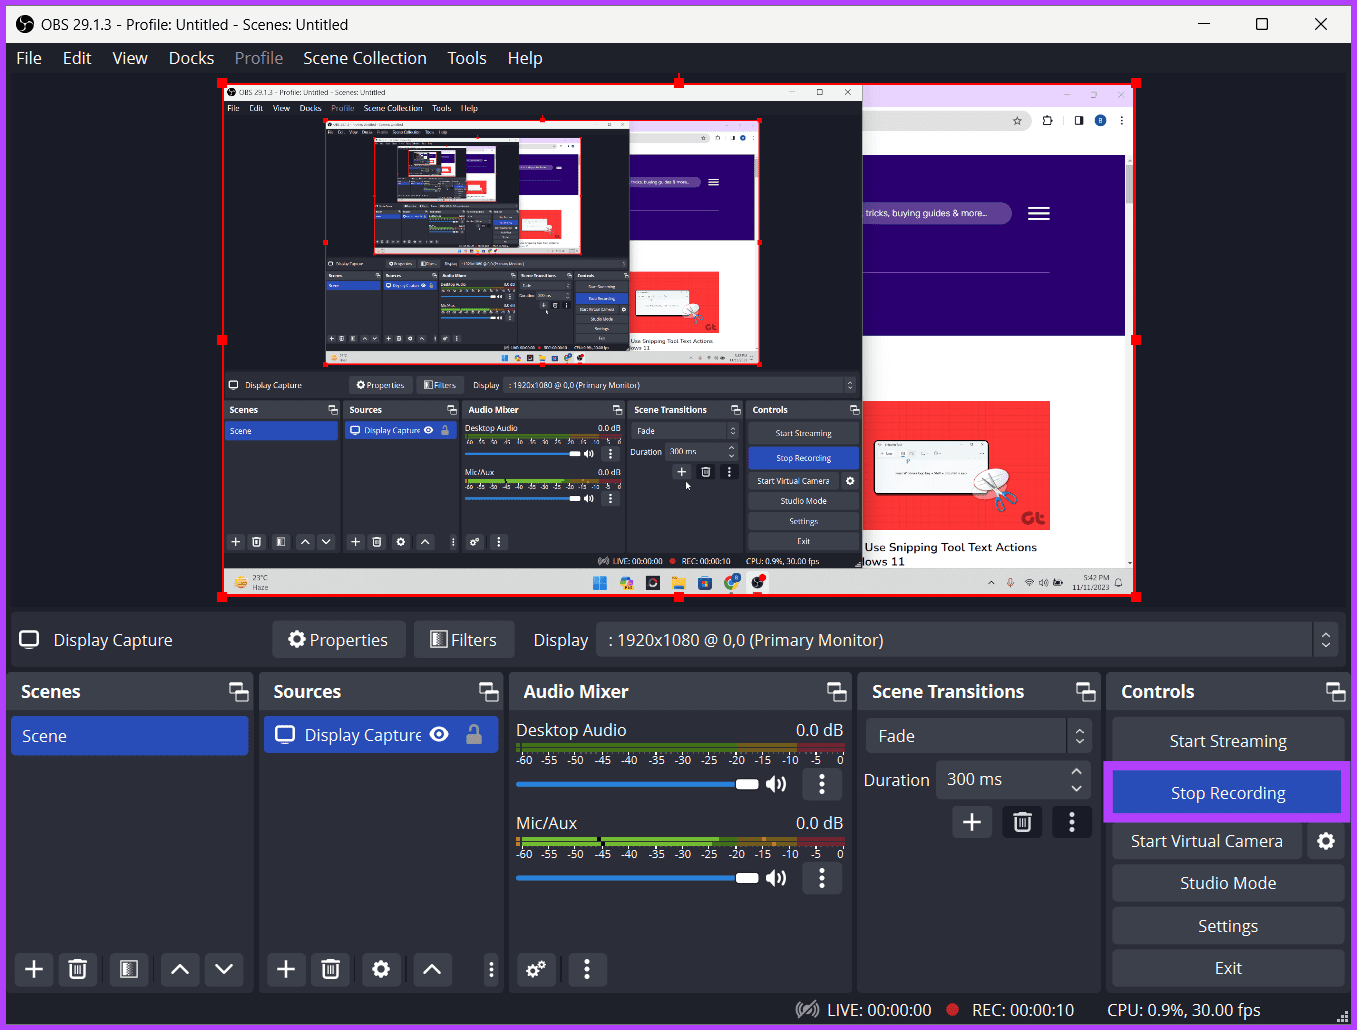
Step 8:Once recorded, maximize OBS Studio and click onStop Recording.

Was this helpful?
The content remains unbiased and authentic and will never affect our editorial integrity.